Mapping Device Buttons to Commands

You can map a device button to a particular command or macro using the drag and drop capability or the contextual menu.

This task shows you how to:

Drag and Drop from a Toolbar

You can use the drag and drop capability to map a toolbar command to a device button.

  1. Make sure that the toolbar containing the command to be mapped is visible.

  2. Press and hold down the left-mouse button on top of the command icon.

  3. Drag the icon to the top of the drag-and-drop area of the selected button:


  4. Release the left-mouse button.

The command is assigned to the device button:
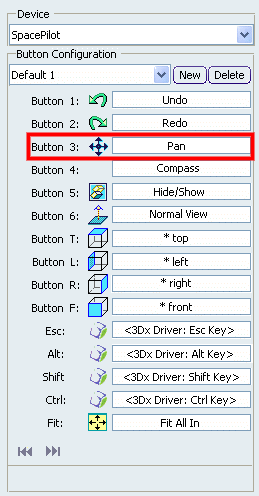
Drag and Drop from the Customize Dialog Box

You can use the drag and drop capability to map a command displayed in the Customize dialog box to a device button.

  1. In the Button Customize dialog box, click Customize... or select Tools > Customize....

  2. In the Customize dialog box, select the Commands tab:


  3. In the Categories list, select a category to map a command, or select the "Macros" category to map a macro.

  4. Select the command or macro to be mapped from the list of commands.

  5. Press and hold down the left-mouse button on top of the command or macro entry.

  6. Drag the command to the top of the button drag-and-drop area.

  7. Release the left-mouse button.

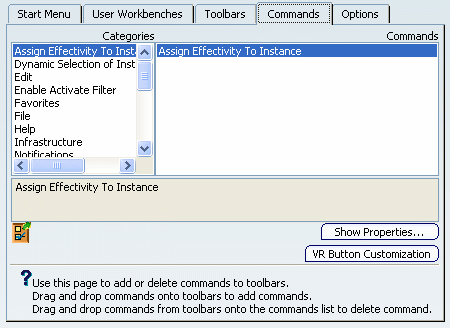
The command is assigned to the device button.

Tip: You can assign the 3Dx Swap view/tree command to one of the buttons of your Space Mouse or Spaceball in order to swap the focus between the specification tree and the geometry.

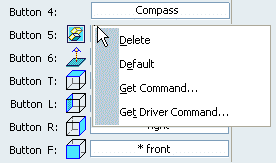
Drag and Drop from Another Button

You can copy a command or macro already assigned to a device button.

  1. Press and hold down the left-mouse button on top of the button drag-and-drop area of the button mapping to be copied.

  2. Drag the button mapping to the other button drag-and-drop area the command or macro is to be assigned to.

  3. Release the left-mouse button.

The command or macro is now assigned to two different device buttons.

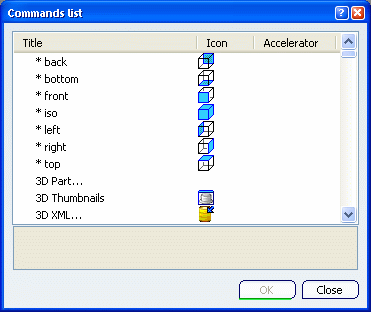
Use the Contextual Menu

As an alternative to the above-detailed drag-and-drop methods, it is also possible to use the contextual menu to access the complete list of available commands.

  1. Right-click the desired button drag-and-drop area to display the contextual menus:


  2. Select Get Command....

    The commands available are displayed:

  3. In the Commands list dialog box, select the command to be mapped.

    Two new commands can be mapped:

    • 3Dx Next Configuration lets you cycle forward through the configurations displayed in the configuration list.
    • 3Dx Previous Configuration lets you cycle backward through the configurations displayed in the configuration list.

    When these commands have been mapped, you just have to press one of the corresponding device button (for instance, the one corresponding to 3Dx Next Configuration) then close the Button Customize dialog box. Next time you open the dialog box, the button mapping corresponding to the next configuration in the list will be displayed.

  4. When finished, click OK to validate.

    The button drag-and-drop area now shows the title of the mapped command.

  5. Select Get Driver Command... to display a list of 3DxWare functions that can be mapped.

  6. Select the 3Dx command to be mapped then click OK to validate.

    Important: To remove a button mapping, right-click the desired button drag-and-drop area then select Delete. This empties the button drag-and-drop area to indicate that no macro or command is currently assigned to this device button.The contextual menu also lets you restore the selected button to its original settings by selecting Default. In case the selected button has no original settings but only a mapped command or macro, the button drag-and-drop area is emptied (mapped commands or macros are not considered as original settings).