Preselecting and Selecting Using the Pointer | |||
| |||
Click Select
 to enter selection mode, if it is not already activated.
Point to the part of the object you want to select.
As you point to objects, different parts of the objects are highlighted, in the geometry area, and the object name is highlighted in the specification tree:
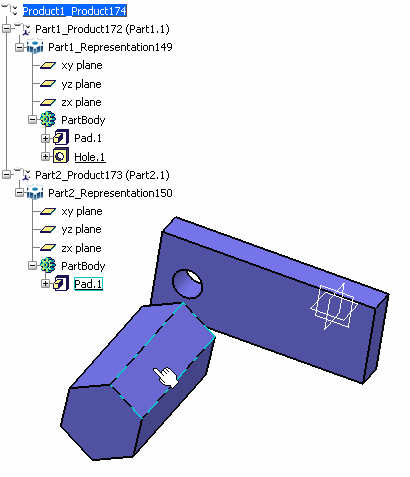
Important: Highlighting is active only if the Preselect in geometry view option is selected (it is selected by default). You can also set the preselected element linetype as well as other useful selection features in the Visualization tab. Optional: Select .
The preselected element is identified in the status bar:

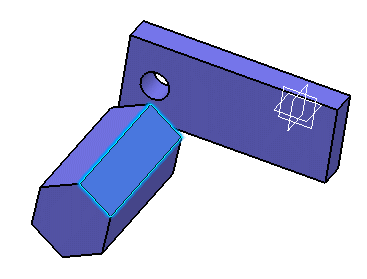
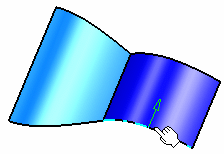
When the element is highlighted, click the highlighted element.
The element is selected:
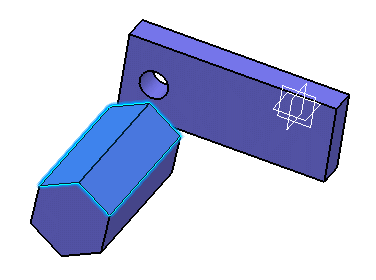
Hold down Ctrl and select another element (a face, in this scenario).
The selected element is added to the initial selection:
Tip: Holding down Ctrl while selecting can be done in:
- The geometry area
- The specification tree
- Lists in dialog boxes.
Holding down Shift while selecting can be done in:
- The specification tree
- Lists in dialog boxes.
To deselect, click anywhere in the background.
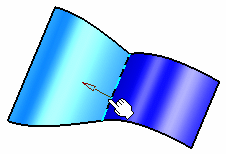
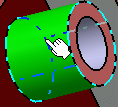
Edges are highlighted as you point them and arrows are displayed to indicate to which element the edge belongs to. This is especially useful in case of overlapped elements as shown in the picture below:
Important: The display of highlighted edges has priority on the display of other elements of the geometry. But if you select a global element of the geometry such as the product or the part body, the highlighted hidden edges are not displayed. Optional: In the geometry area, you can select the constituent elements of objects (faces, vertices, edges, planes, axes).
On certain objects, hidden faces and edges are also highlighted as you point at them and are displayed in a different color:
See Selecting Using the Preselection Navigator for a more powerful method for selecting hidden or coincident elements.