Defining the Batch Parameters | ||
| ||
Optional: To get help from the Batch Monitor window:
- From any tab and with no batch selected in the list, select : the general online documentation on the Batch Monitor opens.
- In the Utilities tab, select a batch in the
list then select
(or right-click a batch in the list then select Batch Monitor Help):
the batch-specific online documentation opens.
When no batch is selected in the list, the Batch Monitor Help command opens the general online documentation.
- Click
 in the top-right corner of the corresponding batch
interface: the batch-specific online documentation opens.
in the top-right corner of the corresponding batch
interface: the batch-specific online documentation opens.
Important: You cannot use F1 to access contextual help. Depending on the location of the objects to be converted, click:
 to search for objects stored in ENOVIA V6: see
Searching for Objects.
to search for objects stored in ENOVIA V6: see
Searching for Objects. to search for file objects: see Searching for Files.
Warning: Appropriate licenses are required to access objects in the provider you are connected to. Specify the report directory either by entering its path directly in the Report directory box, or by clicking
to
browse your filetree.
The Report directory box contains the path of the directory where the reports and the processed documents will be stored.
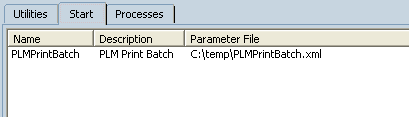
Important: This box is mandatory. By default, it is initialized with the current or temporary directory, depending on your configuration and on the write access. In the Batch Monitor, access the Start tab.
The name and location of the XML file containing the batch parameters you defined in the previous steps (as well as the name of the host computer if you run the batch in remote mode) are displayed:
Optional: From the batch interface, click Open Main HTML Report
 which is activated as soon as a report has been generated:
This opens directly the global report in HTML format.
You can also visualize the report by opening the result file from the directory where it has been saved.
Note: If a GlobalResults.htm file already exists, it is automatically replaced by the new one.
Access the Processes tab to display information on the batch execution:

The following batch-related information is displayed:
- Name of the batch.
- Name of the parameter file used to run the batch.
- Name of the host computer (if you run the batch on a remote computer).
- Status of the batch ("Ended", "Running", etc.).
- Feedback on the batch completion in the "Progress" column. "100%" is displayed when the batch is ended.
- Start and end time, respectively in the "Beginning at" and "Ending at" columns.
- Return code: "0" means that the batch executed correctly ; a code other than zero means that the batch has failed. For more information, see Generic Batch Monitor Error Codes and Generic Batch Error Codes.
- Result of the batch execution (either "Succeeded" or "Failed").
- Batch identification number.
Note: The Processes tab also lets you interrupt the batch execution. To do so, right-click the desired batch from the list then select Interrupt. You can also delete a batch from the list by right-clicking the corresponding line then selecting Delete.
To display the report of the batch execution, double-click the desired batch in the list to display the Results:

This window indicates the beginning and end date and time of the batch execution as well as the name and path of the documents that have been processed.
You can then:
- Click Save to save your results in the folder of your choice. The file formats available are .txt and .xml. Note that this file is different from the one you save from the batch interface: the Save button in the Batch Monitor window lets you save the batch results (i.e. the data displayed in the Results window displayed above) whereas the Save button available in the batch interface lets you save the batch parameters.
- Click Close to close the window and go back to the Batch Monitor window.

