Running the CheckRepresentation Batch | |||||||
|
| ||||||
Start a V6 session.
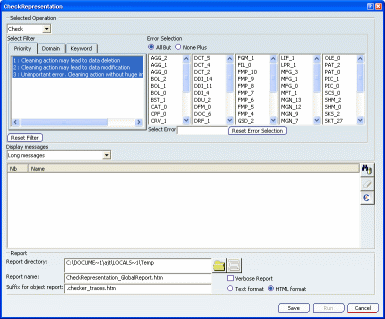
Double-click CheckRepresentation:
Optional: Click
 in
the top right corner to access the batch-specific online documentation.
in
the top right corner to access the batch-specific online documentation.In the Selected Operation pulldown list, choose the action to be performed:
-
Check to check the representation.
-
Clean to check and clean the representation. Cleaned representations will be automatically written, depending on the output criteria you define.
Important: It is highly recommended to first select the operation because many options in the dialog box depend on the selected operation. -
Filter the list of errors to detect.
By default all errors are taken into account but you can filter them through the following tabs:
- Priority: lets you choose the priority errors (1 and/or 2 and/or 3 choices).
- Domain: lets you check or clean errors from one or many specific domains.
-
Keywords: lets you check or clean errors
with a specific impact on:
-
Specification
-
Geometry
-
PCS and performance result
-
LinksMngt
-
Update.
-
You can combine all filters, but at least one error must be selected for processing. Otherwise, an error message is displayed and the last filter selection is ignored. The list of available errors is then dynamically computed.
Optional: To go back to the initial selection (i.e. all priorities), click Reset Filter.
Select the errors to be displayed:
- All but the list of selected errors.
- None plus the list of selected errors.
You can also manually exclude or add an error by selecting it in the list.
Use the Display messages option to select the information to be displayed in the report.
Warning: Short, Long and Short/Long messages are not available for all CheckRepresentation rules and in that case, the same message is displayed. Click
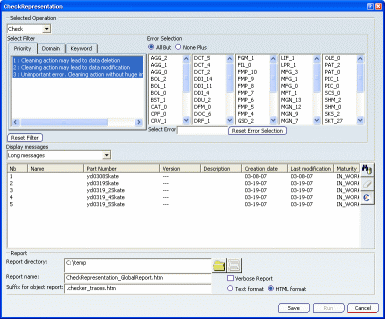
 to open the search dialog box:
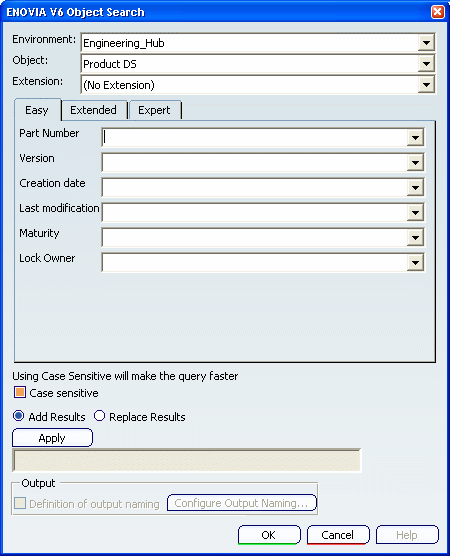
For detailed information on running queries, see Infrastructure User's Guide: Running Batches: Running Batches Using the Batch Monitor then Searching for Objects in the Define Parameters sub-section.
Click Apply to launch the search.
Optional: If you decide afterwards not to process one or several objects displayed in the list, select the objects to be removed and click
 .
.In the Report directory box, enter the report directory or click
 .
.This box is mandatory and is initialized with the current or temporary directory by default.
An additional tag is inserted in the XML file generated when the batch is run:
<folder id="targetDir" destination="C:\temp" folderPath="C:\temp" type="bin" upLoadable="RightNow" extension="*" automatic="1"/>
Important: - You can change the default report directory by setting the PLMBATCH_Default_TargetDir environment variable to a valid directory (i.e. an existing directory with write access).
- When entering directly the path of the new report directory, you can use ${VARIABLE} to valuate the report directory. For instance, entering ${TMP} automatically fills the Report directory box with the C:\temp directory when $TMP is set to C:\temp.
- An error message is displayed when the new report directory does not match an existing directory with write access, and the selection is refused.
Enter the name of report in the Report Name box.
By default, the report is named CheckRepresentation_GlobalReport.htm.
An additional tag is inserted in the XML file generated when you run the batch: <ReportName>CHECKREP_GlobalReport</ReportName>
Important: - You can change this default name by setting the CHECKREP_GlobalReportName environment variable to the new default name.
- You can also change the global report name by entering the desired name in the Report Name box.
- As for the report directory, you can use ${VARIABLE} to valuate the global report name. For instance, entering GlobalReport_${UID} automatically fills the Report Name box with GlobalReport_ME directory when $UID is set to ME.
To add a string at the end of the report name, enter the string of your choice in the Suffix for object report box.
For each processed object, the batch creates an object report in the report directory.
By default, the name of the report is, depending on the selected operation, the name of the object suffixed with .Checker_traces.htm (if you selected Check) or .Cleaner_traces.htm (if you selected Clean).
The global report is in HTML format only, therefore the .htm extension is automatically added even when not explicitly entered in the string.
An additional tag is inserted in the XML file generated when the batch is run:
<ReportStringAppend>Checker_traces.Mystring.htm</ReportStringAppend>
Warning: The same restrictions as for the global report name are applied. Select the Object report type.
The object report can be in text or HTML format. By default, the selected format is HTML.
When changing the object report format, the selected extension is automatically reported in the Suffix for object report box.
Click Save to save your batch parameters in an XML file. You have to save the batch parameters if you want to postpone the batch execution or reuse the batch parameters for another batch execution.
The XML file contains information about the batch (name of the batch, name of the representations you want to check or clean, path directory of the check/clean report, etc.).
This file can also be used to valuate all the fields, using the contextual menu or the PLMBATCH_CheckRepresentation_StartUp variable.
When saved, this file can be edited manually and used later on to run the batch directly without having to re-access the batch interface.
Click Run to launch the batch.
If one of the above boxes is not correctly filled, the command is grayed out. When the operation is over, CheckRepresentation application generates:
- A quick result information you can access in the Processes tab.
- A detailed HTML report saved in the report directory.
To display the light version of the global results, access the Processes tab, then double-click the batch execution line.
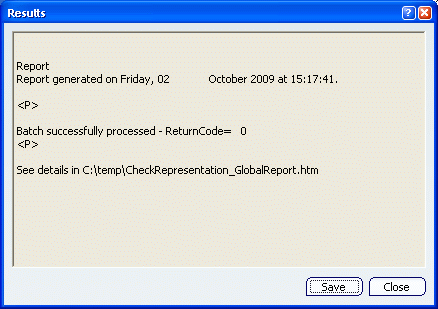
These results indicate if each of the selected objects has been processed or not along with the result (success or failure).The report contains only text and cannot reference images, URL links, etc. At the end of the report, one of the following return codes will be displayed:
- ReturnCode=0 The batch ended successfully.
- ReturnCode=4 At least one object could not be processed.
- ReturnCode=8 The batch aborted.
Optional: To modify your conversion parameters, click Close then run the batch once again.
Optional: Click Save to save your results in the folder of your choice.
This file is different from the one you save from the batch interface: the Save button in the Batch Monitor window lets you save the batch results (i.e. the data displayed in the Results window displayed above) whereas the Save button available in the batch interface lets you save the batch parameters.
Click Close to exit the Results window.
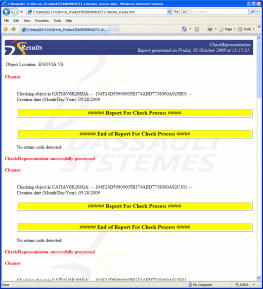
To display an HTML version of the global report, click Open HTML Report
 .
.This button is activated only when a report has been generated, otherwise it is grayed out.
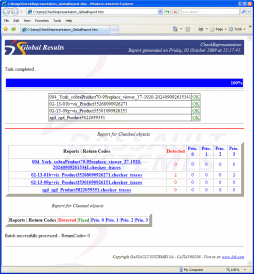
Another method to visualize the report is to open the HTML file from the directory in which it has been saved.
The Global result displays a synthesis of the detected errors that have been checked and cleaned in the CATIA Representation and it contains links to the corresponding object reports.
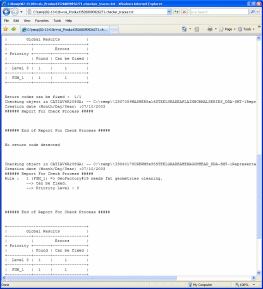
To display the report for each processed object, click OK next to the object of interest, or access the folder where the report has been saved then double-click the desired .Checker_traces file.
Depending on the selected Object report format, an HTML or a text file opens.
The following information is provided:
-
Priority Level: corruption level of the file,
-
Return codes can be corrected: the number of return codes that can be solved in the clean mode.
-
Synthesis report providing the list of errors for each priority.
-
Name of checked and cleaned CATIA representations.
-
Number of detected return codes.
-
Number of fixed return codes.
-
Number of priority1 / priority2 / priority3 return codes.
-
Hyperlinks to a .txt file providing the detailed results for each representation (in the Reports - Return codes column).
The output directory is not automatically emptied by the CheckRepresentation before launching a new check or clean execution. Therefore, if you do not wish to visualize your former results in the .html file, you must clear the directory. The HTML report contains hyperlinks to the official documentation for each detected error.
-
Access the Processes tab to display information on the batch execution.
Tip: - When the batch has been run at least once, an XML file containing the batch parameters is generated. You can reuse these parameters next time you access the CheckRepresentation batch by right-clicking then selecting Read input from parameter file.... This opens a dialog box which lets you navigate to the desired XML file. When finished, click OK to validate: the batch window is updated and displays all the data contained in the parameter file.
- You can also use this XML file as a startup for all CheckRepresentation applications by setting the PLMBATCH_CheckRepresentation_Startup environment variable to the path of the XML file.
To read the reports generated by the batch execution, access the folder c:\temp\batchID.
