Importing 3D XML Files | |||
| |||
Set Creation Preferences
Before importing a 3D XML file, you must define environment preferences.
Before importing files, you must set your creation preferences in the Tools > Options... > PLM Access > Creation Preferences > Identification tab. For more information, see Client Collaborative Platform, Installation and Administration, Settings Customization, Identification.
From the Preferred Environment list, choose an environment.
You can customize your imported object prefix by adding an Identification string.
Click OK to save your settings.
![]()
Importing Files
The following describes how to import 3D XML files into the database.
Select PLM Access > Import > 3D XML or in the Data Exchange Toolbar, click the Import
 .
.
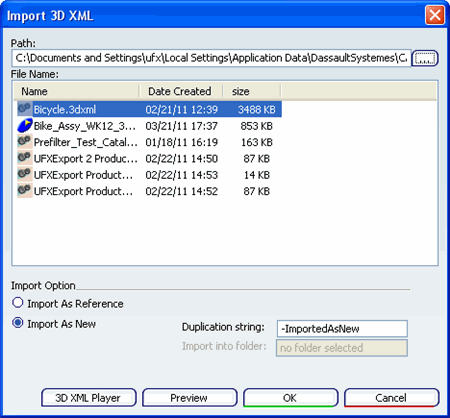
The Import 3D XML dialog box appears.

Note: You can also import 3D XML files using Drag and Drop. For more information about Drag and Drop, see Import 3D XML Files using Drag and Drop.
In the Path box enter the directory that contains the 3D XML file(s) you want to import. You may also browse for the directory using the browse button
 .
.The File Name box is populated with information about the 3D XML files found in the default directory.
In the File Name box select the 3D XML file you want to import. Notice the icons
 with authoring and
 for review.
Tip: You can now import a 3D XML file that contains Review data only. The Import As New option allows you create a new object as a copy of the original. The receiving site becomes the owner of the object, applying new internal identifiers, business rules and lifecycles from the receiving site. You will not be able to receive automatic updates to this new object.

Note: By default, this radio button is selected.
The Import As Reference option imports the object into your database with the same name and internal identifiers as the originating site. The object will not be locally editable because site ownership remains with the originating site. However, automatic updates can be received to keep the object up to date. In the updates, only the changes since the last update will be imported. Therefore importing a 3D XML with the option selected against the originating database will have no effect.
The new object is named according to your customized settings. If you want to manually name each object, you can set the option at Tools > Options > PLM Access > Identification. For more information, see Client Collaborative Platform, Installation and Administration, Settings Customization, Identification.
Important: Variability Space is not available for configured products that have been imported using the 3D XML file. The Variablity Space box cannot be edited, if you select Import As Reference.

You can also import a 3D XML file to a folder.

Important: - You cannot select a root folder. Objects cannot be created under a root folder.
- You can select a subfolder from the search results workbench or the Folder Editor workbench (which is opened in the background) if the folder is not already selected or if you want to change the selection.
You cannot import a 3D XML file containing Folder or Catalog data under a folder.
The Duplication String setting allows you to choose between automatic and manual object naming.
Note that this setting is only available if the User defined duplication string in the Tools > Options > PLM Access > Identification tab has been selected.

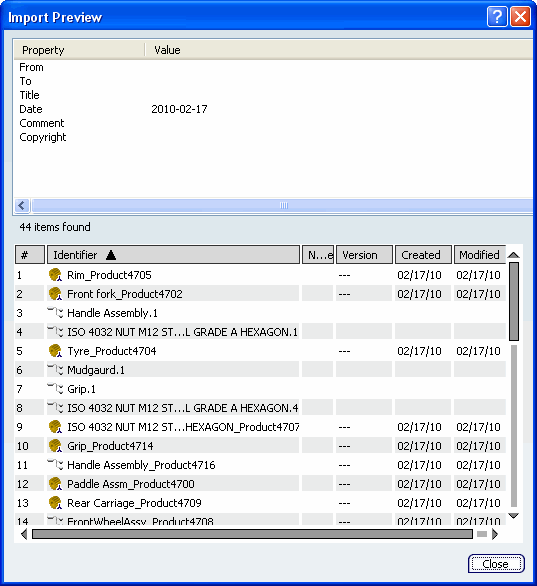
Click Preview to view the identity parameters saved when the 3D XML file was exported.
The Import Preview dialog box appears.
Note: The Import Preview dialog box is only available if the with authoring format was used to export data to 3D XML. Please refere to Exporting Data to 3D XML to know more on exporting data to 3D XML.
Click 3D XML Player to preview the geometry of the saved object, if the 3D XML file has saved geometry.
Click Close to return to the Import 3D XML dialog box.
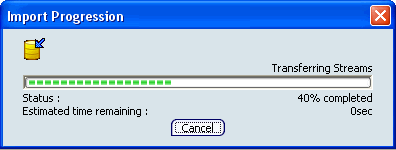
Important: The 3D XML Player is required to view 3D contents. Click OK to finish the import. The Import Progression dialog box displaying the percentage of completion appears.

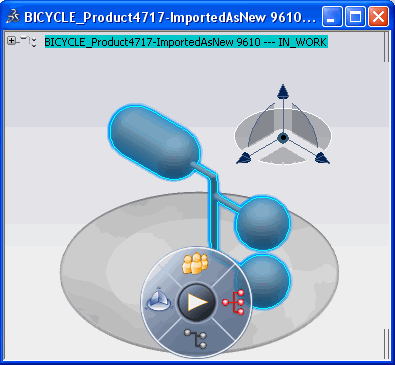
The 3D XML file is explored in the VPM Navigator Workbench.
Note:
- If the 3D XML file contains more than one root, a message appears indicating that the Explore is not possible because more than one Root is imported. However, if the multiple roots are a combination of Simulation and Product or Product and Material, Simulation and Product are selected respectively as a preference while the remaining root is filtered out.
- If 3D XML file is imported under Folder, the Expand command is launched instead of Explore.
Important: You will not receive notifications when Import As New or Import As Reference is performed, even if Type Subscriptions is applied.
![]()
Import 3D XML Files using Drag and Drop
This task shows you how to import 3D XML files using Drag and Drop.
Select and drag the 3D XML with authoring file in the Windows Explorer (from local disk, desktop, and so on) and directly drop it into either any VPM Navigator window, search window or an empty CATIA window.
The mouse pointer will change into
 when you start dragging.
If you drop the 3D XML with authoring file in any Editor window, a message appears indicating that the file [path of the dropped file] is not valid for Import by Drag and Drop. Please try PLMAccess > Import > 3DXML command.
To indicate the import of 3D XML files, a progress bar is displayed.
Note:
- There is no defined target for dropping the 3D XML with authoring file.
- By default, Import As Reference is performed for importing the 3D XML file else Import As New is performed if you hold the Ctrl key for dragging the 3D XML file for import.
- You can import multiple 3D XML files. If one of the 3D XML file fails to import, an error message appears but continues importing the rest. It is therefore advisable to proceed with one by one import progression.
- It is impossible to preview and review the data contained in the 3D XML with authoring file before dropping and after importing it.
