Slot Dialog Box | |||||
|
| ||||
Penetrated Element
If more than one penetrated element are selected Penetrated Element box display the number of selected elements.
The icon ![]() placed in front of Penetrated Element box can be used for listing the selected elements.
placed in front of Penetrated Element box can be used for listing the selected elements.
You can replace or remove the previously selected element and close the window.
![]()
Penetrating Element
If more than one penetrating elements are selected, the Penetrating Element box display the number of selected elements.
The icon ![]() placed in front of Penetrating Element box can be used for listing the selected elements.
placed in front of Penetrating Element box can be used for listing the selected elements.
You can replace or remove the previously selected element and close the window.
![]()
Slot
The Slot box indicates the type of the slot to place.
Note: If Slot is not defined previously NONE is displayed.
| Tip: Simply click on the header of the respective column to sort the list by Penetrating Element, Penetrated Element and Slot. |
![]()
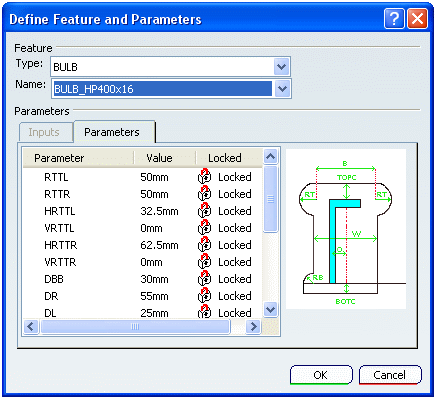
Define Feature and Parameters
Select the element right click > Define/Edit Slot. Define Feature and Parameters dialog box displays.
- Type
- You can select the type of the slot in the Type list.
- Name
In the Name list, select a end cut. The list is customized depending upon the stiffener profile and the type of end cut.
The Table Browser for selection of slot appears when you click More in the Name box.

- This list is generated from the Slot Table defined in Project Resource Management.
- Filters are applied depending upon the Stiffener Type and Slot Type.
- + sign near Slot Name and Slot Type indicates the filter applied. Click Reset Filter to remove filter.
- Parameters
- The Parameter tab contains the list of Parameter name, Parameter Value and Locked / Unlocked status.
| Important: The options in the Type, Name and Parameters list is generated from the Slot Table defined in Project Resource Management. |

