Accessing the Context tab
This task describes how to access the Context tab.
Select Tools > Options... from the menu bar.
The Options dialog box appears.
Select the General category in the left-hand box.
The options for FBDI settings appear, organized in tabs.
Select the File-based Design Import sub-category.
Settings related to FBDI is displayed in tabs in the
right-hand box.
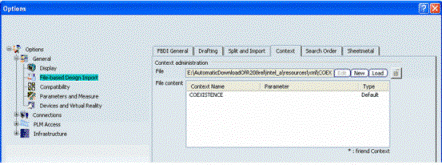
Click the Contexts tab.

The following fields are displayed:
- File. This field displays the path of the XML file.
By default, an XML file containing only the default Context named 'COEXISTENCE' is loaded in the Context tab page, if no other XML file have been created and saved before.
It is not possible to modify this default XML file. New or Load option must be used to change the list of Contexts if this XML file is selected.
- File Content. display all Context data read in the selected XML
file.
Note:
A Context with a star (*)
before its name means that it is a friend Context.
The following actions are available for a file:

Adding a New Main Context
This task describes how to add a new main context.
Click New
in the Context Administration section.
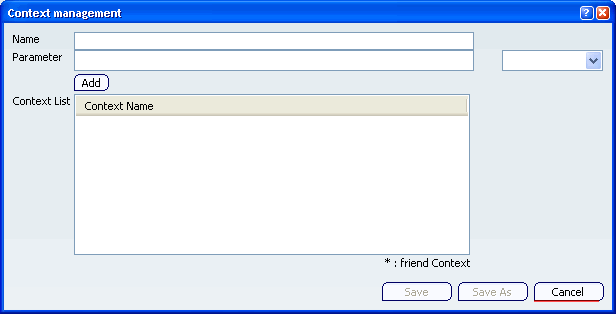
The Context Management
dialog box opens.

Enter values for the following fields:
- Name. Enter a name for the context limited to 123 characters.
- Parameter. Select one of the following values from the drop down list:
Click Add.
The context is added and displayed in the Context List column.

Adding a Friend Context
This task describes how to add a Friend Context.
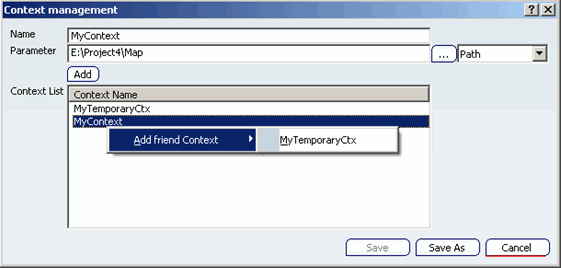
Right-click a main context in the Context list column in the Context Management dialog box and click Add friend context.

The list of possible friend contexts is displayed.
Note:
The same context can be the friend of several main contexts, but it is not possible to define cyclicity between contexts. Also only one level of friend context can be defined which means that you can't define a friend of a friend.
Select a context from the list.
The selected context is displayed as a friend context.
Click Save to save the list of Contexts in the current XML file
or click Save As to save the list of contexts in a new XML file. Click Cancel exit the context management dialog box without saving any modifications.
Note:
The last valid XML file is restored in case of cancellation.