More about Applying 2D Texture Stickers | ||||
|
| |||
Mapping Types
Click
on of the three buttons  to choose the most appropriate type of mapping: either
Planar, Spherical or Cylindrical from the Sticker dialog box.
to choose the most appropriate type of mapping: either
Planar, Spherical or Cylindrical from the Sticker dialog box.
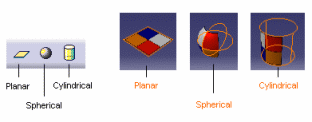
| Planar Mapping | It is similar to a slide projector (a picture on a wall, for instance). You can use it for stickers with two privileged directions such as a picture of a chessboard or a wall of bricks. |
| Spherical Mapping | It is similar to a painted light bulb. You can use it for stickers that do not have a privileged direction. |
| Cylindrical Mapping | It is similar to placing a label on a can of food. You can use it for stickers having a privileged direction such as a picture of marble. |
The sticker is applied tangent to the surface with a visualization in transparency and a default image.
The shape of the manipulator reflects the mapping type
(Planar in our example): 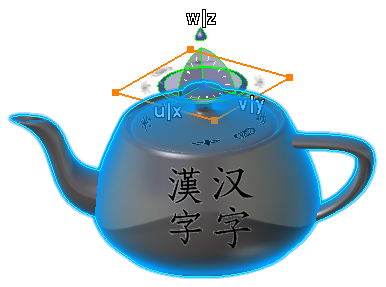
![]()
Texture Adjustment Options
You can adjust the texture parameters of the stickers using the Position, Repeat U, V, Flip U, V, Position U, V and Orientation options appearing in the Sticker dialog box:
| Position | Activates or deactivates the possibility to manipulate the position of the sticker. |
| Repeat U, V | Repeats the sticker texture along u and v axes. |
| Flip U, V | Inverts the sticker texture along u and v axes. |
| Scale U, V | Determines how the sticker is stretched along u and v axes. |
| Position U, V | Determines the gizmo position along u and v axes. By default, the sticker image is centered. |
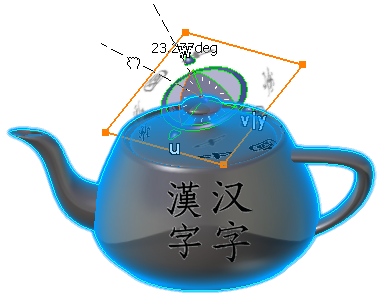
| Orientation | Defines the gizmo rotation around u, v and w axes. The W axis represents the normal to the surface. |
 |
U and V are linked and resized proportionally. This is especially useful for square shapes such as floor material (click this button to unlink U and V). |
 |
U and V are not linked and can be resized independently (click this button to link U and V). |
![]()
Manipulator
Use the manipulator handles to adjust the texture scale as shown below:
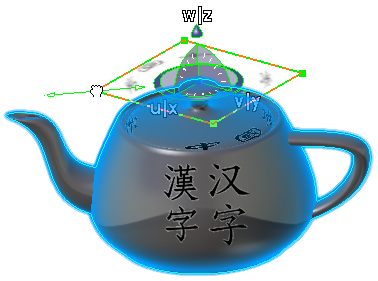
When the sticker is selected, the robot is automatically snapped to it to let you position the sticker as you wish in the geometry.
| Important: Make sure you activated the position manipulation in the Texture tab (the lock in front of Position must be green). |
However, as soon as you access the Sticker dialog box, the manipulator disappears.
| Important: For detailed information on object manipulation with the robot, refer to "Manipulating Objects Using the Mouse and Robot" in the Version 5 - Infrastructure User's Guide. |