Modifying Nodes

You can edit nodes.

This task shows you how to:


Before you begin: Open a document containing a piping route.

Edit Nodes in the Node Edit Table

You can edit nodes in the Node edit table.

  1. Double-click the pipe to activate it.

    A first balloon opens.

  2. Click the pipe again.

    Other options are displayed in the balloon.

  3. Click Edit Node Table in the balloon.

    The Node edit table dialog box opens.
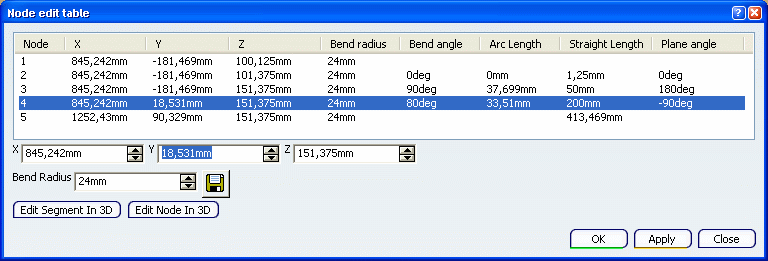
  4. Select a node in the list.

    You can change its coordinates or bend radius.

  5. Click Edit Node in 3D to edit the node in 3D graphic area.

    The manipulator is displayed on the node.

    Note: The Edit Segment In 3D option allows you to modify the segment in 3D graphic area. For more information, see Manipulating Route Segments.

  6. Drag the arrows to modify the node position.

  7. Click Exit and Activate Parent to validate and exit the command.

Edit Node with the Manipulator

You can edit with the manipulator.

  1. Double-click the route to enter the editing mode.

    A balloon opens.

  2. Select Create Point by Manipulation in the balloon.

  3. Select a free node.

    A free node is one that is not constrained - for instance by a defined segment size.

    The robot will be placed on the node you selected.

  4. Drag the arrows to modify the position of the node.

    A new node is created at the new position.

    You can also modify a node at the extremity of the pipe to extend the pipe. Each time you will drag an arrow and release the mouse, a new node will be created.