Click Modify  in the Compass Toolbar.
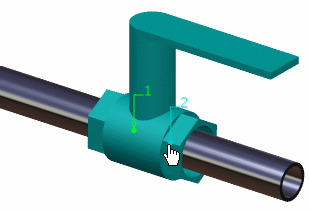
Select the part on which you want to insert automatic parts.
The connections on the part display.
Click Edit  > Insert Automatic Part
  in the balloon.
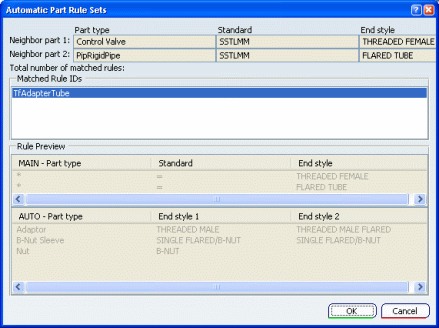
Optional: Click Show autopart rule dialog if you want to open the Automatic Part Rule Sets dialog box when you will insert the automatic part.
Select the port where you want automatic parts inserted.
The Automatic Part Rule Sets dialog box opens.
Note:
If you want to insert automatic parts on each ports, then click Place All  in the balloon.
Select a rule ID in the Matched Rule IDs field and click OK.
The Catalog Browser dialog box opens to let you choose the automatic part to insert.
The catalog opens only if it has more than one part that can be used as an automatic part.
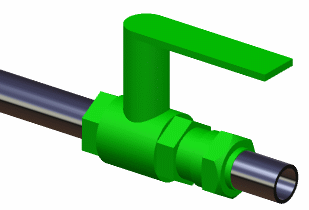
Select the automatic part.
The automatic part is inserted on the selected port.
Click Show final result to display information about the automatic parts that have been inserted.
Information are displayed in the Automatic Part Result dialog box.