Customizing a Scene | ||||
|
| |||
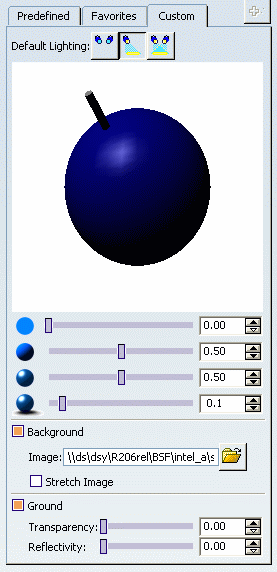
Select the Custom check-box at the top of the list, in the Type field. The Scene window shows Lighting, Background and Ground options:
Note: This window offers you a variety of options:
- No Light:

- One Light, selected by default:

- Two Lights:

Note:
- Default Lighting: defines the position, intensity and shadows of the default lights
(soft shadows give more realism to the lighting but take more
computing time). Three buttons allow you to determine the quantity
of Lighting:
- Background: the Image path can be entered directly or browsed by using the PLM
Chooser selection icon. There are 2 ways to display the image:
- Stretch: this option is selected by default. With this mode, the image is stretched to cover the entire viewer.
- Best Fit: this is the chosen mode when the Stretch option is deselected. With this mode, the image is zoomed to fit into the viewer without changing its ratio.
In our example we have chosen a Background image that is an interior's picture (see step 2.)
- Ground: shows the horizontal ground in the 3D window. It defines a plane
where shadows cast by the model are drawn. The ground itself is not
drawn, but only the shadows (on it) are. This function is useful to
better integrate the model in the background image.
- Transperancy: the Ground transparency can be set to make the shadow less visible.
- Reflectivity: the reflectivity can be set to give a mirror effect to the Ground.
- Background: the Image path can be entered directly or browsed by using the PLM
Chooser selection icon. There are 2 ways to display the image:
Important: When a scene is selected, default lights are updated accordingly to the definition. To prevent users from modifying the default lighting, the View > Lighting command is made inaccessible as long as the rendering toolbar is active. Note: You can find more information about these Lighting options in Setting Lighting Effects , in the Infrastructure User's Guide.
- No Light:
Set these options according to your needs, click OK and click Render.
The result is:

Once you have chosen or created your scene, click Render
 to launch the rendering of the image.
Note: See Using Rendering Options to modify the rendering quality, with indirect illumination and resolution notions.