Creating Drafts with Parting Elements | ||||||
|
| |||||
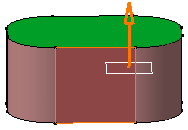
The Draft Definition dialog box displays and an arrow appears on the 3D shape, indicating the default pulling direction. The selected face is red and highlighted. The application detects that other faces are to be drafted and displays them in light red.
Tip: The  icon available after the Faces to draft box
lets you edit the list of the faces to be drafted. For
more information about that capability, see
Editing a List of Elements.
icon available after the Faces to draft box
lets you edit the list of the faces to be drafted. For
more information about that capability, see
Editing a List of Elements. Click the Selection box and select plane xy to define the neutral element .
The application displays the neutral curve in pink.
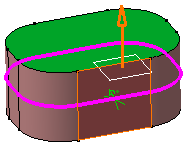
Now click More>> to display the whole dialog box and access the Parting Element capability.

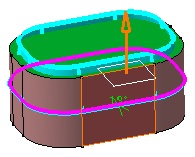
Optional: : Click Preview: the draft is displayed in blue .
Click OK.
Material has been removed, the face is drafted.
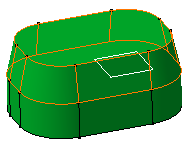
Click OK to confirm. The pad now looks like this:
 .
.