Assembling Bodies | |||||
|
| ||||
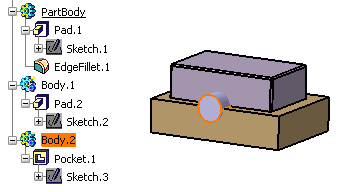
- First, you are going to assemble a pocket to
Part Body. You will note that as this pocket is the
first feature of the body, material has been added. To assemble them, select Body 2 and click
Assemble...
 .
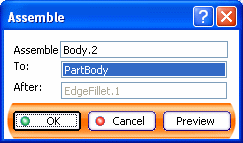
The Assemble dialog box that appears displays the name of the
selected body, the Part Body and the feature (EdgeFillet.1)
after which the Assemble feature is to be located.
By default, the application proposes to assemble the selected body to
Part Body. For the purpose of our scenario, we keep this location.

-
Click OK to confirm. During the operation, the application removes the material defined by the pocket from Part Body.
In the specification tree, Part Body now includes the Assemble.1 feature under which Body.2 is located.Important: - Once a Boolean operation is done, the second body you selected is moved below the Boolean operation. However, there are exceptions to that rule. For details, see Location of Bodies Once the Boolean Operation is Complete in the Part Design User's Guide.
- Avoid using input elements that are tangent to each other since this may result in geometric instabilities in the tangency zone.
- Now delete the assemble operation to go back to the previous state. You are going to perform the second assemble operation.
-
Select Body.2 and Edit > Body2.object >
 Assemble. The Assemble dialog box displays again.
 - Select Body.1 in the specification tree to edit the To: box. Body.1 appears in the box, indicating that you are going to assemble Body.2 on Body.1.
- Click OK. The material defined by the pocket from Body1 has been removed during the operation.