Updating Your Design

You can update your design. Sometimes, when the update fails, you can edit the design to resolve the problem.

This task shows you how to:

Related Topics
More about Optimizing Part Design Performance

What Happens When the Update Fails?

Sometimes, the update operation is not straightforward because for instance, you entered inappropriate edit values or because you deleted a useful geometrical element. In both cases, the application requires you to reconsider your design.

The following scenario exemplifies what you can do in such circumstances.

If you enter the Sketcher to replace the circular edge of the initial sketch with a line, then return to Part Design, the application detects that this operation affects the shell.
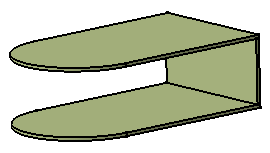
A yellow symbol is displayed on the feature causing trouble i.e. the shell in the specification tree. Moreover, a dialog box appears providing the diagnosis of your difficulties and the preview no longer shows the shell:

  1. To resolve the problem, the dialog box provides the following options. If you wish to rework Shell.1, you can:


    • Edit it
    • Deactivate it
    • Isolate it
    • Delete it

  2. For the purposes of our scenario, click Shell.1 if not already done, then Edit.

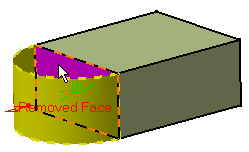
    The Feature Definition Error window displays, prompting you to change specifications. Moreover, the old face you have just deleted is now displayed in yellow. The text Removed Face is displayed in front of the face, thus giving you a better indication of the face that has been removed. Such a graphic text is now available for Thickness and Union Trim features too.
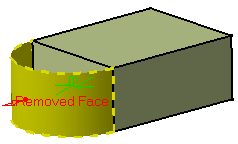


  3. Click OK to close the window.

    The Shell Definition dialog box appears.

  4. Click the Faces to remove box if not already done and select the replacing face.


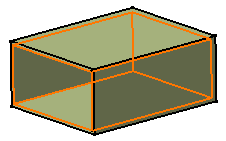
  5. Click OK to close the Shell Definition dialog box and obtain a correct 3D shape.

    The shell feature is rebuilt.


Interrupting Updates

You can update a 3D shape and interrupt the update operation on a given feature by means of a useful message you previously defined.

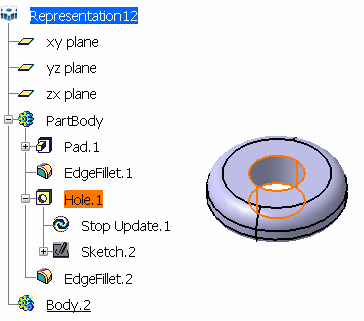
  1. Right-click Hole.1 as the feature from which the update will be interrupted and select Properties . The Properties dialog box appears.

  2. Select Associate stop update.

    This option stops the update process and displays the memo you entered in the blank box. This capability is available in manual or automatic update mode.


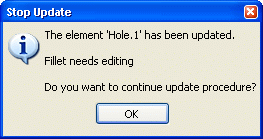
  3. Enter any useful information you want in the blank box. For instance, enter "Fillet needs editing".

  4. Click OK to confirm and close the dialog box.

    The entity Stop Update.1 is displayed in the specification tree, below Hole.1, indicating that the hole is the last feature that will be updated before the message window displays.


  5. Edit Sketch.1.

    This invokes an update operation. When quitting the Sketcher, the 3 shape appears in bright red.

  6. Run the update operation by clicking the icon.

    The Updating... as well as the Stop Update message windows are displayed. The Stop Update windows displays your memo and lets you decide whether you wish to stop the update operation or continue it.


  7. Click Yes to finish.

    The 3 shape is updated. You can now edit the fillet if you consider it necessary.

    Tip: Using this capability in automatic update mode, the Stop Update dialog box that displays is merely informative.

  8. If you decide not to use this capability any longer, you can either:


    • right-click Hole.1, select Properties and clear Deactivate stop update: the update you will perform will be a basic one. To show that the capability is deactivated for this feature, red parentheses precede Stop Update.1 in the specification tree:.
    • right-click Stop Update.1 and select Delete to delete the capability.