From any Product: - Select .
A PPR context with an empty Machining Cell is created. An empty Activities Process Tree opens automatically.
- Create a generic machine or assign a machine from the database.
As soon as a machine is assigned to the Machining Cell, a Part Operation and a Manufacturing Program are created in the Activities Process Tree.
- Alternatively, open an existing Machining Process or PPR context .
 By default,
the
Activities Process Tree opens
automatically.
By default,
the
Activities Process Tree opens
automatically.
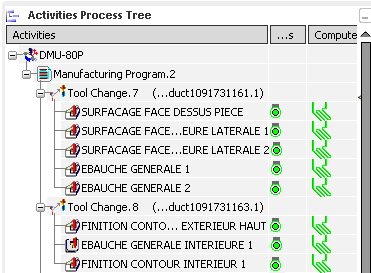
Add Machining Operations to the Manufacturing Program.
Go to and select
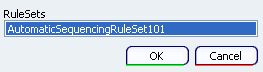
Access to sequencing rules settings check box to authorize access to sequencing rules. - Click {...} and select sequencing rules set from the RuleSet Selection dialog box.
The selected rules set appears in Sequencing Rules Settings dialog box.
This enable the Rules Manager 
By default,
the Rules Manager is disabled.
Select Rules Manager .
- In the Sequencing Rules Settings dialog box that appears
click {...} button to visualize and define the sequencing priority between Machining Operations.If any error occur after you have selected the Rules Manager, the Sequencing Rules Settings dialog box remains unavailable.
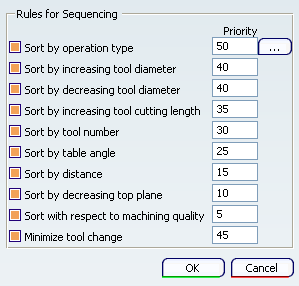
- Select the rules and define the sequencing priority for auto sequencing.
The selected rules appear in Auto Sequence dialog box.
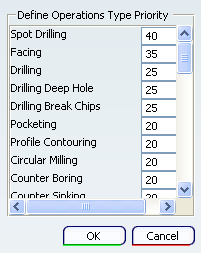
- Sort by operation
type: Select this check box to sort
with respect to Machining Operations type.
- Sort by increasing tool
diameter: Select this check box to sort by increasing tool diameter.
- Sort by decreasing tool diameter: Select this check box to sort by decreasing tool diameter.
- Sort by increasing tool cutting
length: Select this check box to sort by increasing tool cutting length.
- Sort by tool number: Select this check box to sort by tool number
assigned to Machining Operation.
- SSort by table angle: Select this check box to sort by angle of
machine rotation.
- Sort by distance: Select this check box to sort by distance
between Machining Operations.
- Sort by decreasing top
plane: Select this check box to sort by decreasing top plane of an Machining Operation.
- Sort with respect to machining
quality: Select this check box to sort with respect to machining quality of Machining Operation.
- Minimize tool change: Select this check box to sort to ensure that
the tool changes are consolidated and minimal.
Select Auto Sequence  The Auto Sequence dialog box appears.
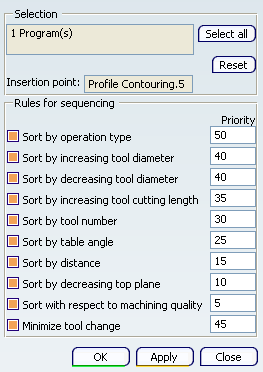
- Place cursor in Selection and select a Manufacturing Program or Machining Operationsin the Activities Process Tree.
- Click Select all to select all the Manufacturing Program and Machining Operations.
- Place cursor in Insertion Point and select Insertion Point in the Activities Process Tree.
- Click Reset to reset the selection.
- Click Apply to sequence the Machining Operations according to the defined rules and priorities.

|