Creating or Editing a Tool Assembly | ||||||
|
| |||||
Create a Tool Assembly
You can create tool assemblies from the Tool Builder toolbar
From any product:
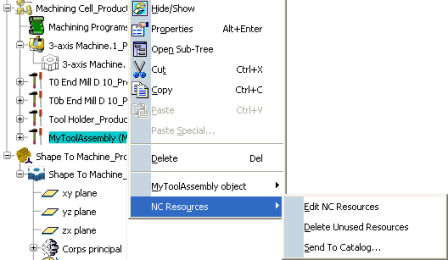
- Alternatively, open an existing Machining Process or PPR context .
 By default,
the
Activities Process Tree opens
automatically.
By default,
the
Activities Process Tree opens
automatically.
- Alternatively, open an existing Machining Process or PPR context .
The Tool Assembly Creation dialog box appears.
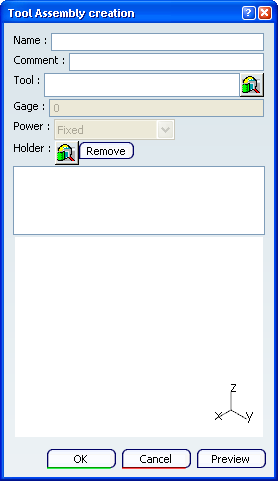
Click
 and select a tool in the dialog box that appears.
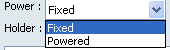
Define the Power component as Fixed or Powered.
See Prismatic Machining User's Guide: Reference Information: 2.5 to 5-Axis Drilling Operations Common Reference Information
Click
and select a the tool holder in the dialog box that appears.- If need be, click Remove to remove a tool holder.
- Click Preview.
The tool assembly is visualized in the 3D viewer of the dialog box.
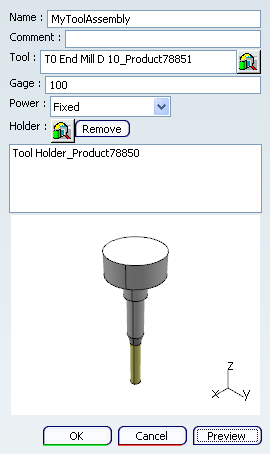
The tool assembly is created in a given order, starting from the tool to the last holder of the tool holder list.
Note:
- You can zoom in, zoom out, rotate, etc. the tool in the 3D viewer of the dialog box.
- The visualization is updated automatically if you modify the Gage value.
- However, you must click Preview to update the visualization after you have modified the holder list.
Click OK to create the tool assembly and exit the dialog box.
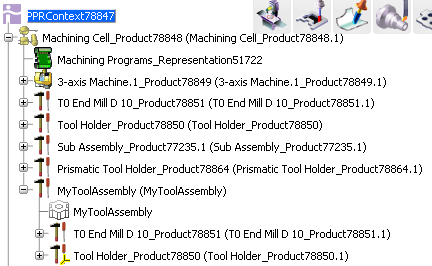
The tool assembly is created under the Machining Cell.