Routing using Logical 3D Architecture Workbench

This section describes how to use the Automatic Routing command to route components of a large logical system. The command routes components such as logical nets, net groups, wires, cables, etc.; it does not route logical connections.

The routing command is run from within the Logical 3D Architecture workbench.

The routing is done automatically and generates various xml files for indexing and routing.

When you run the command you have a choice between committing the routing immediately to the database or simulating the routing. If you choose to simulate the routing you can view the results and then decide whether to run the command again and commit the routing to the database.

A routable object is routed along the shortest possible path.

If the system contains grouped components such as net groups and cables, or groups which are themselves part of other groups, then all components within a group will be routed up to the highest level.


Before you begin:
  • Use the VPM Functional Logical Editor workbench to create a system containing several logical components connected by logical nets, logical wires, etc. You can include logical groups such as net groups and cables.
  • Use the Logical 3D Architecture workbench to create 3D shapes which represent the logical components and pathways which connect the shapes.
  • Propagate your data to the database.
Related Topics
Cross-highlighting Routable Components
Routing using Batch Utilities
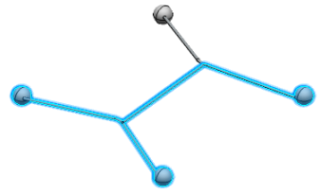
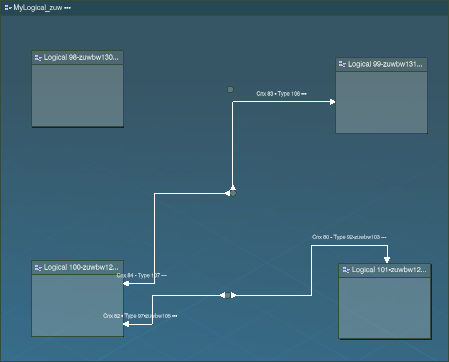
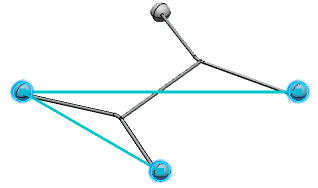
  1. Optional: Review your system: Open your system in the Logical 3D Architecture workbench, review the cross-highlight between 2D and 3D and then close the system again when finished.

    (Closing the system before running the Automatic Routing command will avoid any confusion between the opened version and the newly routed version).


  2. In the Logical 3D Architecture workbench Automatic Routing toolbar, click Automatic Routing .

    The Automatic Routing dialog box is displayed:

  3. Optional: To modify the Index Vault and Report Path, click Properties.


    • Index Vault: Choose the folder in which you want the .cdt and .grt files to be created.
    • Report Path: Choose the folder in which you want the routing report to be created.

  4. Enter the name of the root logical component:

    1. In the Root Name area, click Search.

      The Object Selection dialog box appears.

    2. Search for and then select your logical component in the Object Selection dialog box and then click OK.

      The logical component is displayed in the Root Name box.

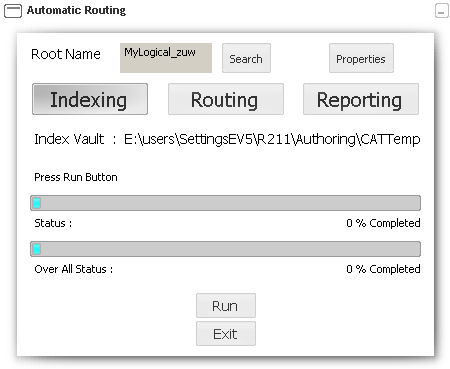
  5. Click Run to build the index in the Index Vault repository.

    A progress bar shows the indexing status.

    When the indexing is finished, a message appears in the Automatic Routing dialog box informing you if the indexing failed or succeeded:

  6. In the Automatic Routing dialog box, click Routing.

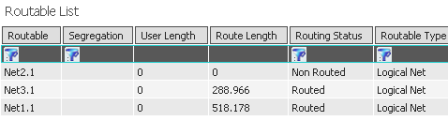
    The Routable List area displays a list of routable components.

  7. Optional: Filter a column or columns to selectively apply routing according to the attribute value or values you select:

    1. In the appropriate column of the Routable List click .
    2. Select the required attribute value from the list.

    The list of routable components is updated according to your selection criteria.

  8. To commit the routing directly to the database, select the Propagate Routing check box.

    If you clear the Propagate Routing check box, when you subsequently click Run, the Automatic Routing command will only simulate the routing.

  9. Optional: To take into account the segregation code of the connections and pathway segments, select the Segregation Code check box in the Automatic Routing dialog box.

    If this option is selected, any routable components having a segregation code will be routed through pathway segments which have the same segregation code.

  10. Click Run to start the routing.

    A progress bar shows the routing status.

    When the routing is finished, a message appears in the Automatic Routing dialog box informing you if the routing failed or succeeded.

    If you selected the Propagate Routing check box, the Routing Status of the routable components will be updated:


  11. To view the routing report, click Reporting and then select one of the following:

    • to view an html version of the report.

      The report opens automatically in your web browser software.


    • to view a spreadsheet version of the report (.xls format).

      A spreadsheet is generated and opens automatically in your spreadsheet software.

      You can then amend, rename and save the report as required.


  12. Click Exit or press Escape to exit the Automatic Routing command. Then reopen your system.

    All the routable components are now routed through pathways as described in the routing report.