Defining Section Probes
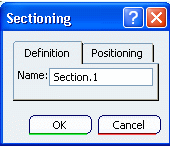
Section probes are used to create section views that can be visualized during a kinematics simulation. You can define section probes to better visualize the product's structure during simulation.


Before you begin: A kinematics simulation referencing a mechanism must be open in the Kinematics Simulation workbench.
Related Topics
Creating a Kinematics Scenario
Reviewing Scenario Results
  1. Click Section Probe.

    The Sectioning dialog box appears.

    For more information, see ENOVIA Live Validation User's Guide: Sectioning.

  2. Modify the section's name.

  3. Adjust the selection to be sectioned. You can add or remove products by clicking them either in the 3D viewer or in the specification tree.

  4. Adjust the section cut.

    You can reposition the section using the Manipulator, the Robot, and the balloons. For more information, see ENOVIA Live Validation User's Guide: Sectioning.

    Important: The Behavior tab is not available for the section probe as the probe's behavior is controlled by the kinematics scenario.

  5. Click OK.

The probe is identified in the specification tree under the Probes category. By default, the section probe is included in the current scenario. A plane representation appears under each section probe of the current scenario. The section views are calculated and displayed during the computation or preview of a scenario. Also see Simulating and Generating Results.