In the menu bar, select . In the specification tree, select the product in which
you want to add a representation.
The Insert - Step 1 - Representation dialog box appears.
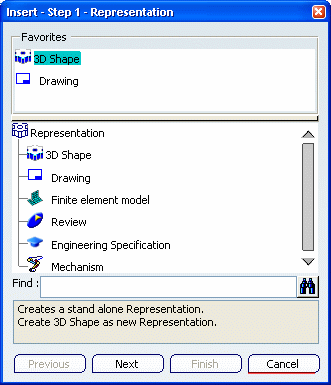
Select Mechanism, and click Next.
In the dialog box that appears, enter the name and properties
for the mechanism representation. In the Mechanism Options tab, select the appropriate options: - Select Include
all kinematics connections into the mechanism check box to include all
engineering connections in the product as joints in the
new mechanism representation.
- Select Create all possible kinematics commands check box to include all controlled constraints in the engineering connections as commands in the new mechanism representation.
- Select Link all independent submechanisms check box to assemble the existing mechanisms instanced under subproducts in the new mechanism representation.
If you clear any of these check boxes, you must add mechanisms, joints, and commands to the mechanism manually from
the Mechanism Manager (see
Setting Up a Mechanism). Click Finish.
The mechanism representation is created under the product.
|
 in the Mechanism Edition toolbar. The mechanism is created for the currently selected product in the specification tree.