Creating Engineering Connections for Mechanisms

You can create mechanism-oriented engineering connections with controlled constraints that can be used as commands in the mechanism.

Refer to Engineering Connections in the Assembly Design User's Guide for more general information about creating engineering connections.


Before you begin: You must have a product consisting of multiple subproducts or 3D parts open in the Assembly Design workbench.
Related Topics
About Degrees of Freedom
About Mechanism Representations
Setting Up a Mechanism
  1. Click Engineering Connection .

    The Engineering Connection dialog box appears.

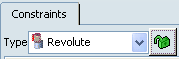
    Important: Engineering connections are created under the currently activated product. Activated products appear highlighted in blue in the specification tree.

  2. Select the connection Type to be created.


    If you select User Defined , an appropriate connection type will be assigned to the engineering connection based on the constraints you apply.

    Techniques for creating predefined engineering connection types are discussed in more detail in Engineering Connections in the Assembly Design User's Guide.

  3. Assign the driving constraints for the engineering connection.

    Warning: The orientation option in the Engineering Connection dialog box that specifies which products are able to move is used only for the positioning of the products in the reference assembly; it does not restrict the subsequent motion of parts or products in a mechanism representation.

  4. If you are defining an engineering connection that can be manipulated using a command in the mechanism representation, you must define at least one additional controlled constraint:

    1. Select the geometry supports for the constraint. Controlled constraints can be created only between lines, points, and planes.
    2. If necessary, change the type of constraint by right-clicking the constraint type and selecting Replace from the menu that appears. The controlled constraint must be either an Angle or an Offset.
    3. Right-click the constraint Mode, and select Controlled from the menu that appears.

      The Value column is updated automatically based on the current configuration of the model. This value determines the initial configuration of the mechanism.

    4. Double-click the Lower and Upper columns to define the lower and upper value limits for the controlled constraint.

      Tip: The upper and lower angle values are used as the command limits in the Kinematics Simulation dialog box. If you do not define limits with the constraint, you can define them directly in the Kinematics Simulation dialog box. For more information, see About Mechanism Representations.

  5. Lock any engineering connections that have a predefined type with controlled constraints to include them as specifications for your mechanism.


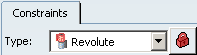
    Unlocked engineering connections can still be used to enforce driving constraints in a mechanism, but controlled constraints in an unlocked engineering connection cannot be used as commands in a mechanism.

  6. Click OK.

The engineering connection is created and identified in the specification tree.

Tips:
  • To edit an engineering connection that is specified as a command, right-click the command in the specification tree and select Edit Connection.
  • To highlight an engineering connection that is specified as a command, as well as the impacted parts in the specification tree, select a command in the specification tree.