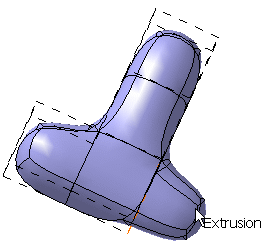
Extruding Faces and Edges | |||||
|
| ||||
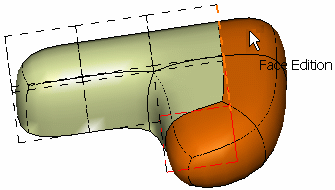
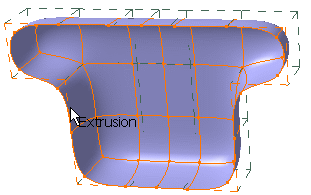
Extrude Faces
You can extrude faces.
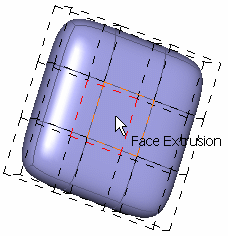
Click Extrusion
 .
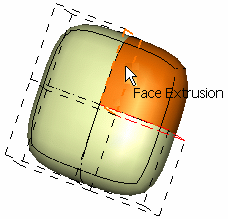
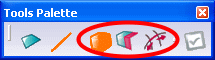
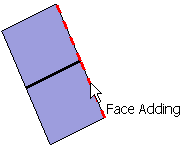
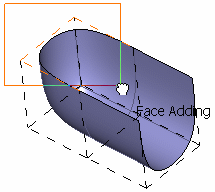
.Tip: You can also access this command by pressing ALT+SHIFT+X. Select a surface.
A Tools Palette is displayed.
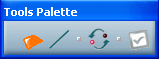
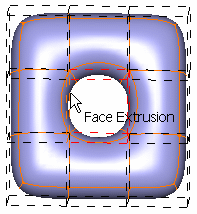
Click Face Extrusion
 if not already selected.
Select a face.
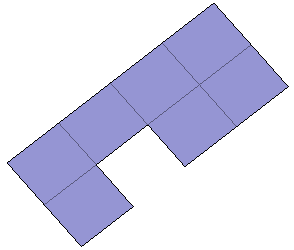
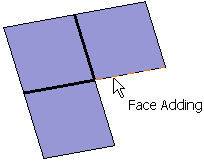
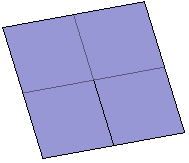
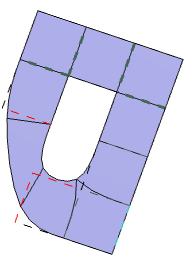
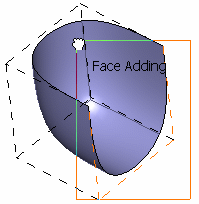
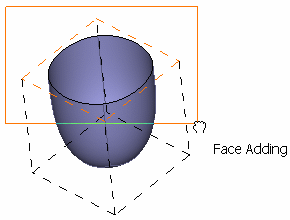
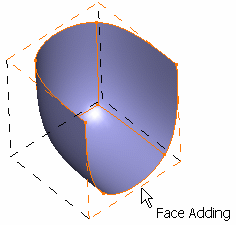
Click to add a face.
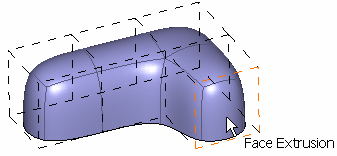
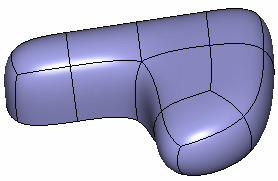
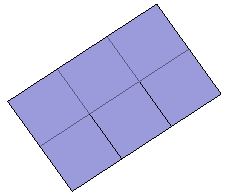
An extrusion made of five faces is created. The extrusion direction is normal to the selected face.
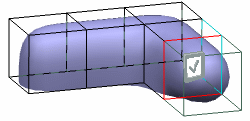
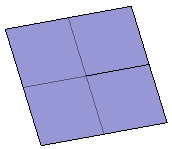
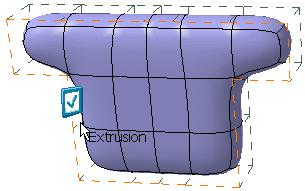
Click
 to invert the extrusion side.Before the inversion
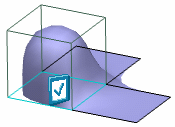 After the inversion
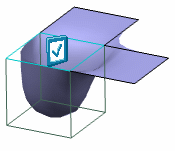
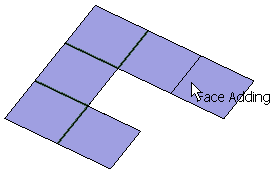
Extrude Faces Using Multi-Selection
You can extrude faces by selecting several faces.
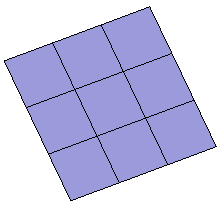
Click to add as many faces as you wish.
Tip: As an alternative, you can also use the Shift key and draw a trap to extrude several faces.
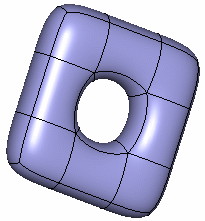
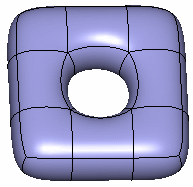
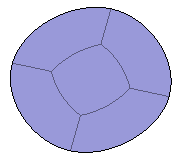
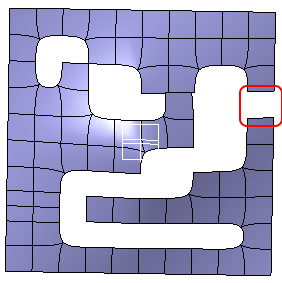
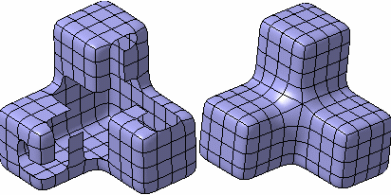
Create a Hole Inside a Closed Surface
You can use the Extrude command to create a hole inside a closed surface.
Press Ctrl and select a face on each side of the surface. Faces must be face to face.
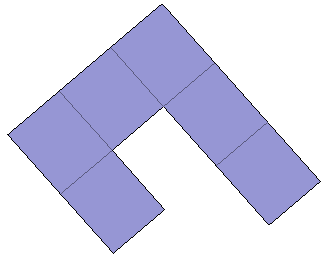
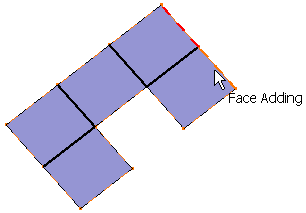
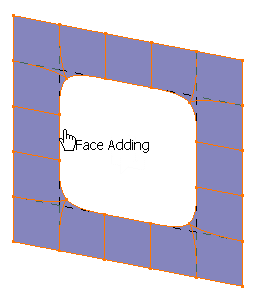
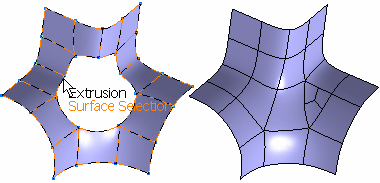
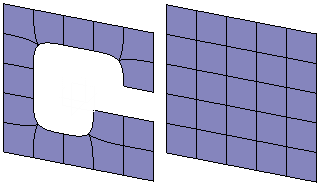
Fill Faces
You can use the Extrude command to fill several faces.
Press Ctrl to select the four connected faces to fill the hole.
Tip: As an alternative, you can also press Shift and draw a trap to fill the hole.
![]()
Extrude Edges
You can extrude edges.
Click Extrusion
.Tip: You can also access this command by pressing ALT+SHIFT+X. Select a surface.
A Tools Palette is displayed.
Click Edge Extrusion
 .
.Select an edge.
Warning: You can only select the free edge of an open surface. 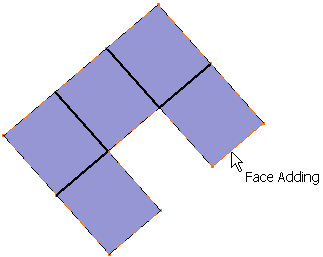
Click to add a face.
A single face on a plane is created. It is defined by the mean plane of the face connected to the edge.
Extrude Edges Using Multi-Selection
You can extrude edges by selecting several faces.
Click to add as many faces as you need.
Tip: As an alternative, you can also press Shift and draw a trap to fill the hole.
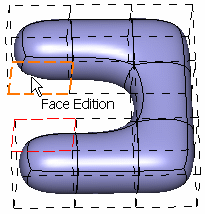
Extrude Edges Using the Fill/Inactive Fill Modes
You can extrude edges using the fill or inactive fill modes.
Perform steps 1 to 3.
The following icons are available in the Tools Palette.
They let you:
-
 select the Fill mode
 -
 select
the Extrusion mode
select
the Extrusion mode -
 propagate edges
-
Click Fill
.- Select any border to fill the hole.2 edges
 3 edges
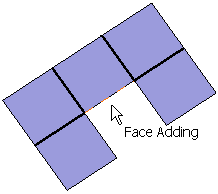
 4 edges
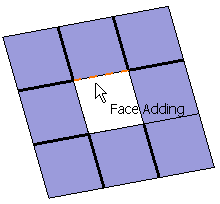
Tip: You can press Shift and draw a trap to fill a hole. Note: When the Fill mode is activated, the join of two sets of edges is automatically detected. When the number of edges differs in both sets, only edges of the smallest set are joined. Therefore several resolutions may be possible.
The
 and
and  buttons appear in the Tools Palette. Click either Previous Result or Next Result to choose the desired resolution:
- Press Shift and draw a trap to create the
extrusion.
In our example, we drew two traps:
Here is the result: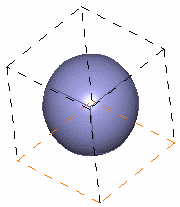
- Select any border to fill the hole.
Click Extrusion
.- Press Ctrl
to select the edges.Along an edge
 With a Corner
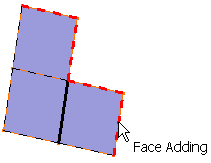
 All edges
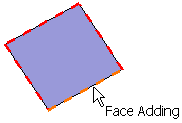
Important: The icons
and
are
used when the extrusion is ambiguous. If there is no ambiguity,
only one of both icons is available. The examples below show this ambiguity: - Use the Shift key and draw a trap to create
the extrusion.In our example, we drew two traps:

 Here is the result:
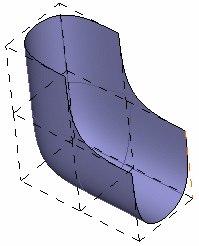
- Press Ctrl
to select the edges.
Propagate Edges
You can use the Extrude command to propagate the selection to all the free edges.
Click Propagation
Select an edge, as shown below:
All connected edges are selected to create the extrusion.
With propagation of edges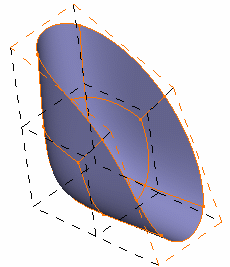 Without propagation of edges
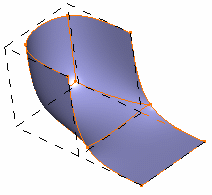
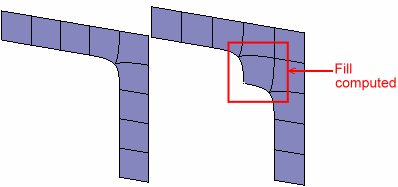
Propagate Edges to Compute a Fill
You can use the Extrude command to propagate edges in order to compute a fill surface.
Click Propagation
Select an edge, as shown below:
All connected edges are selected to create the extrusion. You can see that the surface is filled.
Note:
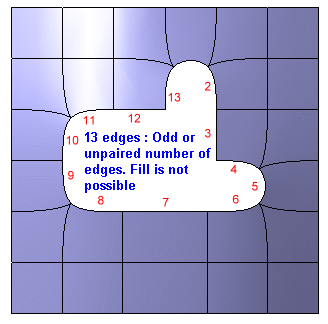
- The number of edges defined for the fill must be lower than 30. If there are more than 30 edges, fill a few faces individually and multi-select edges to compute the fill at one time.
- The number of edges defining the boundary should be in pair
i.e. even numbers. Otherwise, a warning message is displayed in the
3D area.
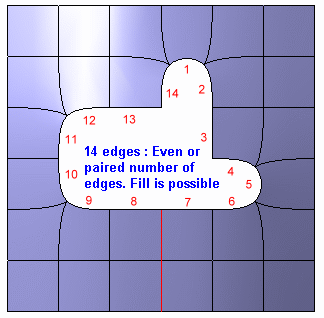
Add or remove an edge.
For instance, add an edge to form an even number of edges and allow the fill computation:
Warning: In some cases, the fill cannot be computed: - If the edges have an intersection:
To compute the fill, remove the intersecting face.
- If the selected edges lie on an external boundary:
To compute the fill, first fill the external face.
- If the number of edges passing through a point is different from 3 or 5.
- If the mesh has a symmetry axis or plane. In this case, the mesh after the fill may lose its symmetry characteristic.
- If the edges have an intersection:
Propagate the Symmetric Filling of Multiple Faces
You can use the Extrude command to propagate the selection to all the free edges to compute a symmetric fill wherever the zone to be filled is symmetrical.
Click Propagation
.Select an edge, as shown below:
You can see that the surface is filled symmetrically:
-
In case of a subdivision surface with an odd number of edges, the fill is computed with a triangular face:
-
In case of a subdivision surface with open edges more than the maximum
number allowed (i.e. greater than 30 edges), the fill can be computed in
steps (maximum of 30 edges in a step) using Ctrl and
Shift keys:
- In case of a surface with external edge open, symmetric fill can be
computed:
- If two subdivision edges are not joined by a face, fill is computed:
- If two subdivision edges are joined by a face, extrusion is computed:

-