Creating a Geometrical Tolerance | ||||||
|
| |||||
Click Geometric Tolerance
 in the Annotations toolbar (Tolerancing sub-toolbar).
Select an element (geometry, dimension, dimension value, text or point) or click in the free space to position the anchor point of the geometrical tolerance.
-
If you select an element, the anchor point will be an arrow. Note that you can modify this symbol by Handling Annotation Leaders.
-
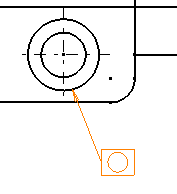
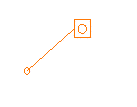
If you select a point in the free space, the anchor point will be a small balloon.
-
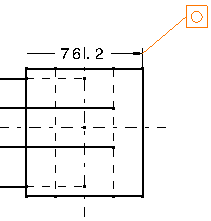
If you select a dimension, the anchor point will be at the intersection of the dimension line and the extension line.
-
If you press the Shift key and select the extension line, the leader is perpendicular to the extension line and the anchor point corresponds to the position of the cursor when you click to create the geometrical tolerance.
-
If you select a dimension value or a text, no leader will be created. The geometric tolerance will be displayed just below and parallel to the element you selected.
-
Move the cursor to position the geometrical tolerance and then click at the chosen location.
The Geometrical Tolerance dialog box appears.
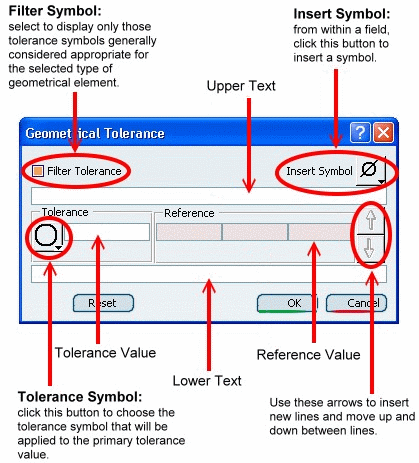
Important: - At this step, you can apply the parameter values of an existing geometric tolerance to the tolerance you are creating: to do this, simply select the existing geometric tolerance.
- If you have selected the Use style values
to create new objects check box in Tools
> Options > Mechanical > Drafting > Administration
tab, the Geometrical Tolerance dialog
box is pre-filled with custom style values (as defined
in the Standards Editor). In this case, Properties
toolbars and the Tools Palette are disabled
during the creation of the geometrical tolerance.
On the other hand, if you have not selected this option, the Geometrical Tolerance dialog box is pre-filled with the last entered values (if any). In this case, Properties toolbars and the Tools Palette are active during the creation of the geometrical tolerance.
- You can reset the current style values in the Geometrical Tolerance dialog box at any time using the Reset button.
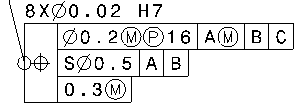
Type the upper and lower texts in the appropriate fields. You may also add symbols if you want to.
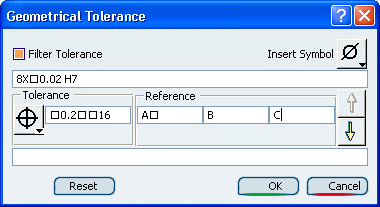
The geometric tolerance is updated as you define values for each field.
Click OK when you are done. The geometrical tolerance is created.
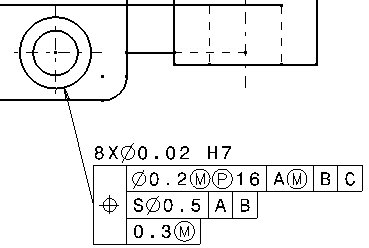
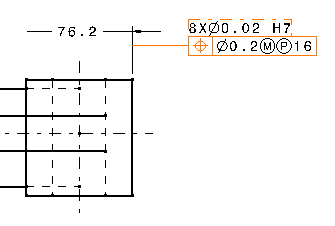
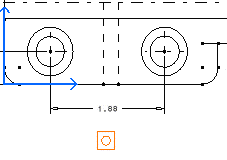
You can add an all-around symbol to the leader. To do this, select the geometrical tolerance, right-click the yellow manipulator on the arrow and select Application Zone > All Around.