Working with Datum Targets | ||||||
|
| |||||
Create a Datum Target
You can create a datum target on a projection view.
Click Datum Target
 in the Annotations toolbar (Tolerancing sub-toolbar).
Select a point to be used to position the datum target (anchor point).
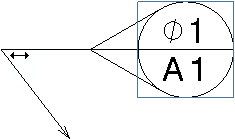
A dialog box appears with the Area Size box pre-selected and the value A1 in the Associated Datum box and at the same time previewed on the drawing or layout.

Note: If the value selected in the Associated Datum box changes, it is instantly reflected in the datum target.
Tip: You can click Reset  to reset the Area Size box to an empty string, the Associated Datum box to A1 and the Area Size diameter symbol to the datum target style value.
Select the required area shape icon.
For example, select the Circular area of contact symbol, if you specify the circle as datum target.
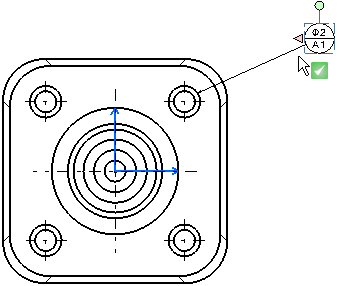
Click
 in the dialog box or click in empty space to validate the inputs provided in the dialog box and exit the command.
The datum target is created.
![]()
Convert a Non-movable Datum Target into a Movable Datum Target
You can easily convert a non-movable datum target into a movable one and vice-versa.
A movable datum target indicates that the datum target is not fixed at its basic location and is free to translate.
Click the datum target you want to change.
All the manipulators of the datum target are displayed.
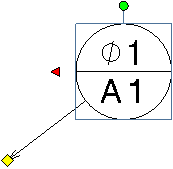
Click the red manipulator.
The datum target is instantly changed to the movable datum target. The manipulator is oriented to the inside of the movable datum, indicating that it's movable. Slide text manipulator is also displayed, using which you can change the position of the datum target.
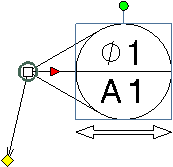
Note: The red movable manipulator is added on the left or on the right of the datum depending on which side of the datum the first leader is. For more information about manipulators on movable datum target, refer to More About Working with Datum Targets.
 .
.