Creating Parallel Curves | |||||
|
| ||||
Create the Parallel Curve
You can create a curve that is parallel to an existing curve at a specified offset distance.
Click Parallel Curve
 in the Wireframe toolbar (Curve Offsets sub-toolbar).
The Parallel Curve Definition dialog box appears.
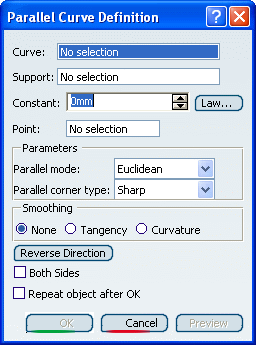
Specify the offset of the parallel curve either by:
- entering a value or using the graphic manipulator in the Constant box.
- selecting a point in the Point box (in both
Geodesic and Euclidean mode).
In that case, Constant is grayed.
- entering a value or using the graphic manipulator in the Constant box.
Select Parallel corner type (useful for curves presenting sharp angles).
Warning: This option is disabled when the Geodesic mode is selected. - Sharp: the parallel curve takes into account the
angle in the initial curve.
By default, the Parallel corner type is Sharp.
- Round: the parallel curve is rounded off as in a
corner.
Warning: This type is only effective with acute angles, not with obtuse or re-entrant angles. It corresponds to the trace left by a ball rolling on a profile. - Sharp: the parallel curve takes into account the
angle in the initial curve.
Click OK to create the parallel curve.
The curve (identified as Parallel.xxx) is added to the specification tree.
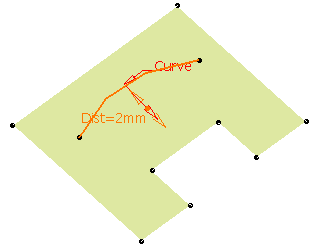
Parallel curve defined by an constant offset value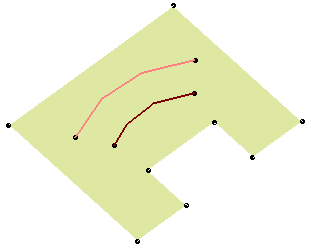 Parallel curve defined by a passing point
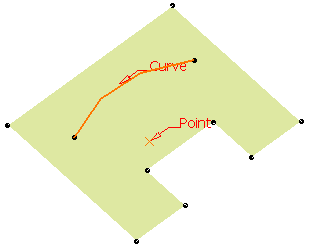
![]()
Smooth the Curve
You can smoothen parallel curves by defining continuity.
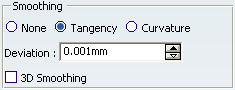
- You can smooth the curve by selecting either:
- None: deactivates the smoothing result
With a support surface:
- Tangency: enhances the current continuity to tangent continuity
- Curvature: enhances the current continuity to curvature
continuity
You can specify the maximum deviation for G1 or G2 smoothing by entering a value or using the spinners.
In the case of an Euclidian parallel curve, only small discontinuities are smoothed, especially discontinuities that are introduced during the parallel operation.
Moreover, a topology simplification is automatically performed for G2 vertices: cells with a curvature continuity are merged.
Without support surface:
- 3D Smoothing: the smoothing is
performed without specifying any support surface. As a consequence, the resulting smoothed curve has a better continuity
quality and is not exactly laid down on the surface. As a consequence, you may need to activate the
Tolerant laydown
option. Refer to
Customizing section: General. This option is available if you previously select the Tangency or
Curvature smoothing type.With 3D smoothing option selected
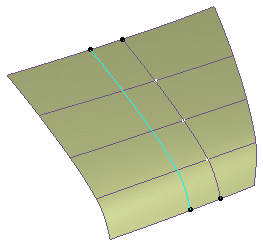 With 3D smoothing option cleared
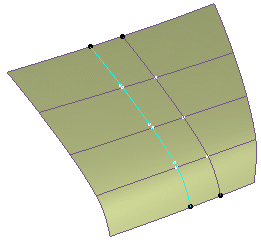
- None: deactivates the smoothing result
![]()
Use a Law
You can define a law to create parallel curves.
Click Law... to display the Law Definition dialog box. In this case, you need to select a law as defined in Creating Law.
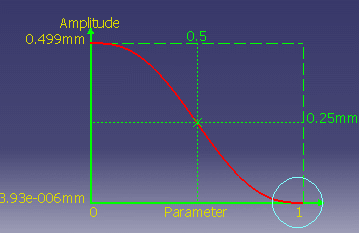
The 2D viewer enables you to preview the law evolution before applying it.

The Law Viewer allows you to:
- visualize the law evolution and the maximum and minimum values,
- navigate into the viewer by panning and zooming (using the mouse),
- trace the law coordinates by using the manipulator,
- change the viewer size by changing the panel size
- reframe on by using the viewer contextual menu
- change the law evaluation step by using the viewer contextual menu (from 0.1 (10 evaluations) to 0.001 (1000 evaluations)).
Warning:
When creating a parallel curve with the following characteristics:
|