Keeping the Initial Element | |||||
|
| ||||
Use the Keep Mode
The implementation of Keep Mode allows modification features to have the same behavior as creation features.
This mode is identical for both geometrical set and ordered geometrical set environments, whatever type of the input and output (= result) elements are, that is to say whether they are datum or not.
The input element:
- remains in the show area
- can be detected and selected in the 3D geometry
- can be detected in the specification tree
When this command is active, as soon as you perform an action in which you create or modify geometry, you are in fact working on a copy of the initial element.
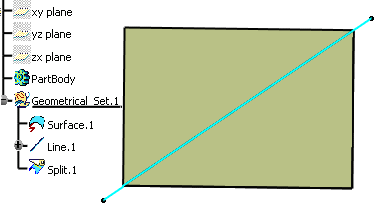
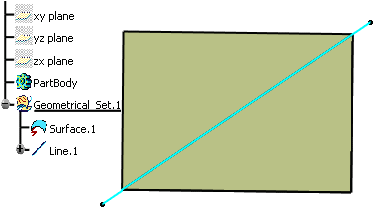
Let's take an example with the Splitting Geometry command:
A surface and a line are created. The surface is to be intersected with the line
.
![]()
Use the No Keep Mode
You can use the No Keep mode. The No Keep mode is only available with the modification and the contextual creation commands. It has no impact on the creation commands.
Here is the list of modification commands:
| Command | Conditions |
|---|---|
| All transformations | Creation/modification mode |
| Blend | With Trim support |
| Bump | |
| Connect Curve | With Trim mode |
| Corner | With Trim mode |
| Curve Smooth | |
| Diabolo | No GSD plane as input |
| Extrapolate | With Assemble result |
| Fillet | With Trim Support |
| Healing | |
| Inverse | |
| Join | |
| Near | |
| Shape Morphing | |
| Split | No GSD plane as input |
| Sweep | Tangent sweep with Trim mode |
| Trim | |
| Wrap Curve | |
| Wrap Surface |
Here is the list of contextual creation commands:
| Command | Conditions |
|---|---|
| 3D Curve Offset | |
| All transformations | Creation/modification mode |
| Combine | |
| Develop | |
| Offset | |
| Parallel Curve | |
| Project | |
| Variable Offset |
The implementation of this mode depends on the type of the input and output (= result) elements, that is to say whether they are datum or not. This mode transforms contextual creation features into modification features.
Datum Input and Datum Result
You can use datum inputs to get datum results.
This mode is identical, whatever the environment (geometrical set or ordered geometrical set).
The input element:
- is deleted
- is replaced by the created feature (if their dimensions are strictly identical)
- its child features are impacted
=> Behavior 1 (see table below)
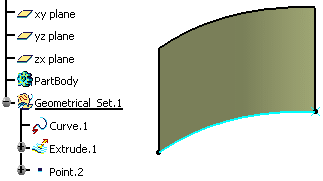
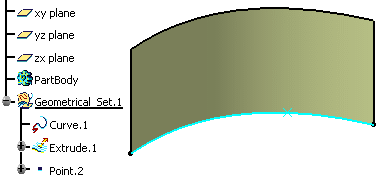
Let's take an example with the Splitting Geometry command.
A datum curve, a point on the curve, and a surface based on this curve are created.
Feature Input and Datum Result
You can work in different environment with feature input and get datum result.
Geometrical set environment
You can work in geometrical set environment with feature input and get datum result.
The input element:
- is put in the no show area
- cannot be detected and selected in the 3D geometry
- can be detected and selected in the specification tree
- its child features are not impacted
=> Behavior 2 (see table below)
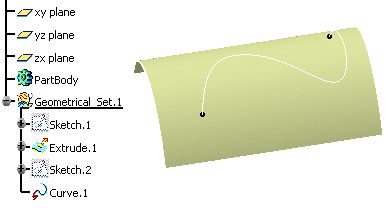
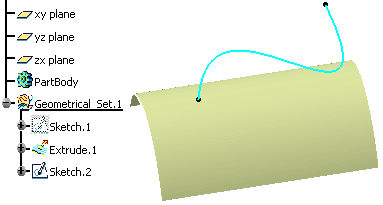
Let's take an example with the Creating Projections command.
A sketch and a surface are created. The sketch is to be projected onto the surface.
Ordered geometrical set environment
You can work in ordered geometrical set environment with feature input and get datum result.
The input element:
- is put in the no show area
- cannot be detected and selected in the 3D geometry
- can be detected and selected in the specification tree
- its child features are impacted if the created feature is inserted before them
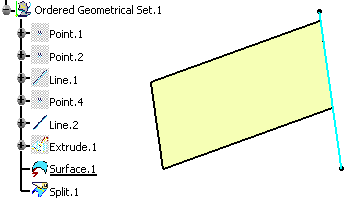
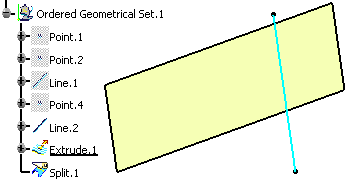
Let's take an example with the Splitting Geometry command.
An extruded surface is created and a line intersects it (Line.2). The extruded surface has a child feature (Split.1) and is defined as the current object.
Datum or Feature Input and Feature Result
You can work in different environment with datum or feature input and can get feature result.
Geometrical set environment
You can work in geometrical set environment with datum or feature input and can get feature result.
The behavior is the same as above (Feature Input and Datum Result).
=> Behavior 2 (see table below)
Ordered geometrical set environment
You can work in ordered geometrical environment with datum or feature Input and can get feature result.
The input element:
- is in the ghost area
- cannot be detected and selected in the 3D geometry
- can be detected and selected in the specification tree
- its child features are impacted if the new feature is the created inserted before them
=> Behavior 3 (see table below)
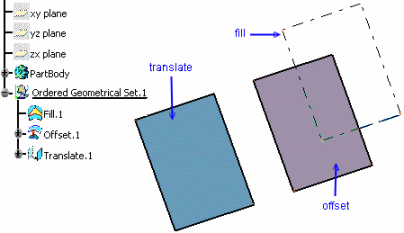
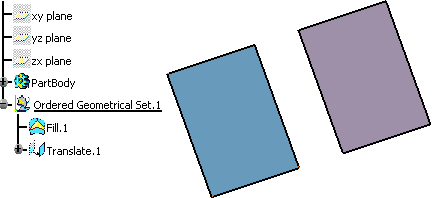
Let's take an example with the Offset command.
A fill and a translate of this fill are created. The translate is thus a child of the fill. The fill is defined as the current object.
Double-clicking No Keep Mode lets you work in a global mode: as a consequence, all created features will be in No Keep mode.
Note: To conclude with the No Keep mode, here is a table summarizing the different behaviors:
| Datum Result | Feature Result | ||
| Datum Input | Geometrical Set | Behavior 1 | Behavior 2 |
| Ordered Geometrical Set | Behavior 1 | Behavior 3 | |
| Feature Input | Geometrical Set | Behavior 2 | Behavior 2 |
| Ordered Geometrical Set | Behavior 2 | Behavior 3 |
- The default option is Keep mode for creation features and and No Keep mode for modification features.
- Features created using the contextual menu are always set to Keep mode.
- If a sub-element is selected as an input of a command in No Keep mode, it is not put in the no show area.
- When editing a feature, you cannot change its mode.
