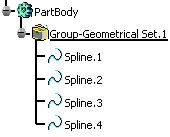
Managing Groups

You can manage groups of elements in a geometrical set entity.

This task shows you how to:


Before you begin: Create a 3D shape containing a geometrical set.
Related Topics
Managing Geometrical Sets

Create a Group

You can create a new group and add the desired geometrical entities in it.

  1. Right-click the desired geometrical set entity in the specification tree.

  2. Choose the Geometrical Set.x object > Create Group... command.


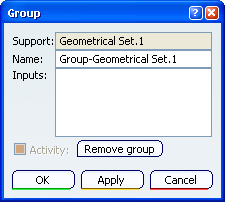
    The Group dialog box appears.


    The Support box indicates the name of the Geometrical Set entity where the group is to be created.If needed, modify the proposed default group name that appears in the Name box.

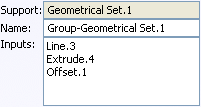
  3. Select entities, that is the inputs, to be excluded from the group and remain visible in the tree.

    Other entities become hidden.


    Note that the inputs of the group must be the direct children of the geometrical set. You cannot select entities that are not direct children. For instance, if a geometrical set aggregates a sub-geometrical set, the components of the sub-geometrical set cannot be selected as the inputs of the group created on the geometrical set. Indeed, if expanding the group, they would be visualized as the internal features of the group (since they belong to the sub-geometrical set that is inside the group) and as the inputs of the group as well.

  4. Click OK to create the group.


    • The Activity option is used as a read-only information. It is selected to inform that the group is collapsed or cleared to inform that the group is expanded.

    • You can click Remove group to reset the group definition.

Edit a Group

You can edit an existing group. You can rename or remove the group.

  • Right-click the desired group in the specification tree and select the Geometrical Set.x object > Edit Group... command from the contextual menu. You can then:


    • rename the group
    • remove the group
    • add entities to the group by removing some inputs
    • remove entities from the group by adding some inputs

Expand and Collapse a Group

You can expand or collapse the group by making the geometrical entities visible or hidden in the specification tree.

  1. To expand a collapsed group, right-click the desired group in the specification tree and select the Group-Geometrical Set.x object > Expand Group command from the contextual menu.

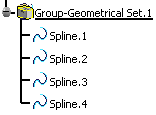
    All the entities belonging to the group are then visible in the specification tree.

  2. To collapse a group, right-click the desired group in the specification tree and select the Group-Geometrical Set.x object > Collapse Group command from the contextual menu.

    The portion of the specification tree related to the group appears reduced. Only the inputs of the group are visualized in the specification tree.

Move a Group to a New Body

You can move a group from one geometrical set to another.

  1. Right-click the desired group in the specification tree and select the Geometrical Set.x object > Change Geometrical Set command from the contextual menu.

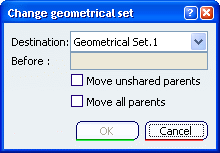
    The Change geometrical set dialog box appears.

  2. Select the new body where the group is to be located.


    By default, if you select a body, the group is positioned last within the new body. However, you can select any element in the new body, before which the group will be located. See also Managing Geometrical Sets.

  3. Click OK to move the group to the new body.


Important: You have the possibility, when creating a new feature, to integrate it or not as an input in a group. Refer to General Settings in the Customizing section.
Warning: This command is not available with ordered geometrical sets.