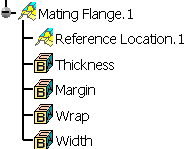
Creating a Mating Flange | |||||
|
| ||||
Click Mating Flange
 in the BiW Templates toolbar.
The Mating Flange Definition dialog box appears.
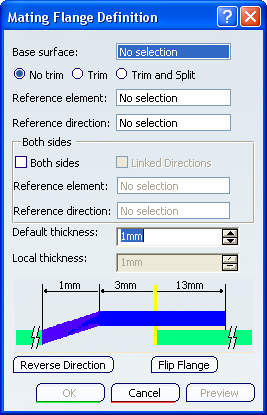
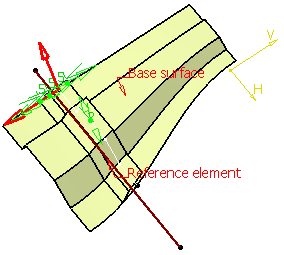
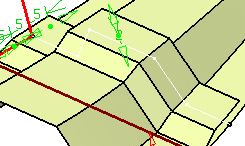
Select a Reference direction.
Tips: - To select a default reference direction, right-click in the field and choose the Default Selection contextual item. Conversely, to clear the selection, right-click in the field and choose the Clear Selection contextual item.
- If a direction is selected, both Default Selection and Clear Selection items are available from the contextual menu.
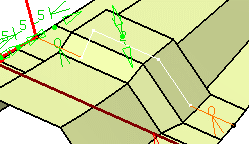
Warning: The intersection or projection curve must be long enough to join the base surface boundaries. 
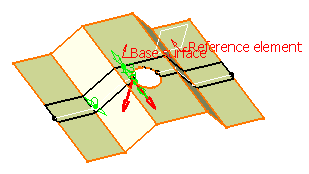
The mating flange reference location feature is created in hidden mode and is temporarily shown during edition.Define the mating flange parameters by clicking the value to edit in the dialog box or by clicking the manipulators in the 3D geometry.
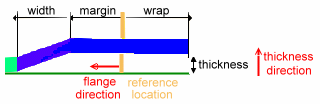
- Width
- Margin
- Wrap
Click Preview.
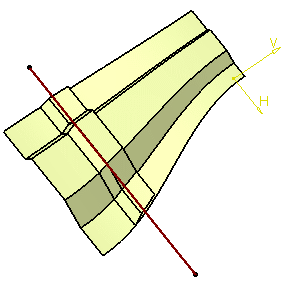
Define the thickness:
-
Default thickness: is generally the 3D shape thickness and is used as the default offset value. You can define its value either by entering a value in the field or using the manipulators in the 3D geometry.
-
Local thickness: enables you to define multiple thickness values. They replace the default value and can be positive, negative, or null. Select a sub-part of the reference curve and define its value either by entering a value in the field or using the manipulators in the 3D geometry. This thickness value applies to all surfaces on which the curve lies as well as connex surfaces that are tangent continuous. You can select several sub-parts, each one having its own local thickness. For each value, a corresponding 3D dimension is created in the 3D geometry and can be edited by double-clicking it.
In case no local value is defined, the Local thickness field is grayed out. Otherwise, the corresponding sub-part and the 3D dimension are highlighted in the 3D geometry. If you select the highlighted sub-part, the local value is deleted and the default thickness value is used.
Important: - The thickness that is aggregated under the mating flange feature is the default thickness.
- You can create a mating flange on a portion of the base surface
that contains a hole simply by setting the Default
thickness
to 0mm:
-
Click OK to create the mating flange.
The new shape (identified as Mating Flange.xxx) is added to the specification tree. Its reference location is aggregated under the Mating Flange feature and can be used as an input for a further operation.