Creating Text

You can create a text with possible line wrapping. This text is assigned a frame of unlimited width, even though it may reach the frame boundary.

You can set text properties of a text (anchor point, font size, justification, etc.) either before or after creating it.


Before you begin: Open or create a drawing representation.
Related Topics
Font Tab
Creating an Associated Text
  1. Click Text in the Annotations toolbar.

  2. Click where you want to insert the free text on the drawing. A green frame appears, as well as the Text Editor dialog box.

    Tip: To associate a text to an element, click Text and then press the Shift key while selecting the element you want the text to be associated to. To make the text vertical, click Text and then press the Ctrl key while clicking in the drawing where you want to create your free text.

  3. If you want to specify the horizontal boundary of the text, drag the frame to where you want to place the boundary. If you want the horizontal boundary to adjust to your text, proceed with the following step.
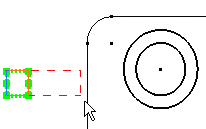
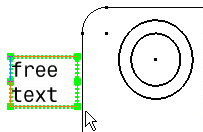
  4. Type your text in the Text Editor dialog box: "free text", for example.

    Tip: To start a new line, press Shift + Enter.

    The drawing is automatically updated with the text you are typing in the Text Editor dialog box.

    Important:
    • You can copy text from another application and paste it into the Text Editor dialog box, and vice-versa. Note that the text layout and properties will not be preserved when copying/pasting.
    • When copying/pasting an engineering symbol (such as φ Phi for example) in the text editor, note that the symbol is pasted as a plain character. As a result, if the symbol does not exist in the current font, the resulting character in the drawing may be different.
    • You cannot copy complex objects (such as tables) from another application.

  5. When you are done typing your text, click OK in the Text Editor dialog box, click anywhere on the drawing, or click any command. You can also click the Select icon : in this case, the text will remain selected so you can change its properties for example.

    You can now start setting the properties of the text you just created using the Text Properties toolbar.


    Important: Although you can create a text in a view that is not up-to-date, you cannot associate it to geometry. If you try to do so, a message appears, indicating that the selected or active view is not up-to-date.