Using Feature Modifiers

The feature modifiers are functional features that modify the shape or functional features. The feature modifiers alter selected features, more precisely their shapes, by adding or subtracting material from them.

This task shows you how to use feature modifiers. It is divided into following sub-tasks:


Before you begin: Use a 3D shape composed of four shellable prisms.
Related Topics
About Feature Modifiers
Transforming Axis to Axis

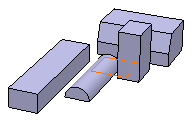
Adding Feature Modifiers (Cut)

You can add feature modifiers.

In this task, you will add three feature modifiers, more precisely three cut features.

  1. Click Cut in the Dress up & Modifiers toolbar (Feature Modifiers sub-toolbar).

    The Cut dialog box appears.

  2. Select the feature you want to cut.
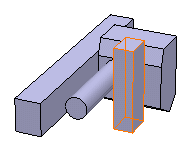


  3. Select the plane as the Cutting element.

  4. Click OK.


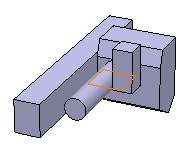
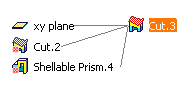
  5. Right-click the feature, in our example Shellable Prism.1 and select the Parents/Children... .

    The Parents and Children dialog box that appears displays the relationship.

  6. Repeat steps 1 to 3 by selecting Shellable Prism.2 and Shellable Prism.3 as the features to cut and yz plane as the Cutting element.

  7. Click OK.


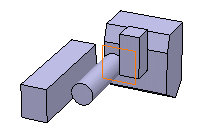
  8. Right-click Cut.2 and select the Parents/Children....

    The Parents and Children dialog that appears displays the relationship.

  9. Repeat steps 1 and 2 by selecting Shellable Prism.2 and Shellable Prism.4 as the features to cut.

    You will notice that when Shellable Prism.2 is selected, Cut.2 is selected instead. Also you cannot select Shellable Prism.3. This is because Cut.2 is the top of the chain and Cut.2 is already in the list of the features to cut. Consequently, Cut.2 cannot be inserted a second time.

    You will notice Cut.2 has a modification overlay icon applied in the specification tree.

  10. Select xy plane as the Cutting element and Click OK.


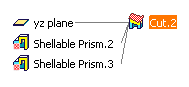
  11. Right-click Cut.3 and select the Parents/Children....

    The Parents and Children dialog that appears displays the relationship.

  12. Right-click Cut.2 in the specification tree and select the Deactivate contextual command.

    The Deactivate dialog box proposes you to deactivate its children too.

  13. Click OK to confirm.

    Cut.2 and Cut.3 are deactivated.

Using Feature Modifiers

You can transform the feature modifiers.

This sub task shows you how to use feature modifiers.

  1. Click Transform and select the Rotation tab.

  2. Select Shellable Prism.2, Shellable Prism.3, and Cut.1 as the features you want to transform.

  3. Select Rotate Axis to define the rotation axis and enter 45 degree as the rotation angle.


  4. Click OK to confirm the rotation.

  5. Activate Cut.2.

    The Activate dialog box proposes you to activate its children too (Cut.3).

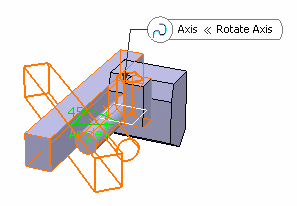
  6. Right-click Rotate.1 and select Parents/Children...

    Rotate.1 is applied to Shellable Prism.2, Shellable Prism.3 and Cut.1 before it is modified by Cut.2.
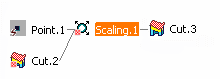
  7. Deactivate Cut.3 and Rotate.1 in the specification tree. in the specification tree.

  8. Select Transform and click the Scale tab.

  9. Select Shellable Prism.3 as the feature to transform.

    Notice that Cut.2 is automatically selected.

  10. Select Point.1as the scaling reference.

  11. Enter 2 as the ratio value and click OK.

  12. Activate Rotate.1 and Cut.3.

  13. Right-click Scale.1 and select Parents/Children...

    You will notice that Scaling.1 is applied to Cut.2 before it is modified by Cut.3.

    Warning: When you try to use a single feature modifier such as Cut on target features which contain a shape feature using the To Shell option for a limit, an Update Diagnosis dialog box may display. It is displayed when one target modifies the shell while another target depends on the shell. Note that Grill feature modifier always uses the To Shell option.