Create a Group using a Bounding Box
You can create a group of nodes, element edges, element faces, or elements using a bounding box.
To create a group in the GroupsGroups set,
click Spatial Group
 in the Groups toolbar. To create a group under an
existing mesh, right-click the mesh in the specification tree
and select .
The Spatial Group dialog box appears. Optional: In the
Name box, modify the name of the group. In the Mode list, select Box. In the Type list, select one of the
following: - Nodes to create a group of nodes.
- Edges to create a group of element
edges.
- Faces to create a group of element
faces.
- Elements to create a group of
elements.
Position the bounding box.
- Click the 3D shape to initialize the position of
the bounding box.
- Move your cursor to specify the size of the
bounding box.
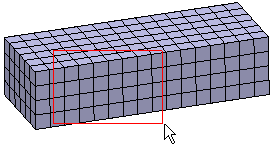
- Click again when you are satisfied with the box
size.
The bounding box is displayed and the
robot is automatically positioned at the selected
location.
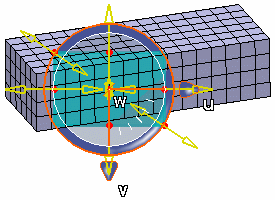
Use the sliders of the bounding box or the
robot to modify and move the bounding box.
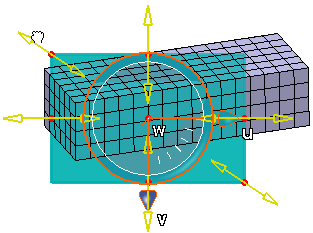
Click Apply to create and update the
group. Click OK.
The box group is created and appears in the specification tree under
the Groups set, and the bounding box disappears.
If you created a group directly under an existing mesh,
the group is stored under the mesh in the Nodes and Elements set.

Create a Group using a Bounding Sphere
You can create a group of nodes, element edges, element faces, or elements using a bounding sphere.
To create a group in the Groups set,
click Spatial Group
 in the Groups toolbar. To create a group under an
existing mesh, right-click the mesh in the specification tree
and select .
The Spatial Group dialog box appears.
Optional: In the
Name box, modify the name of the group. In the Mode list, select Sphere. In the Type list, select one of the
following: - Nodes to create a group of nodes.
- Edges to create a group of element
edges.
- Faces to create a group of element
faces.
- Elements to create a group of
elements.
Position the bounding box.
- Click the 3D shape to initialize the position of
the bounding sphere.
- Move your cursor to specify the diameter of the
bounding sphere.
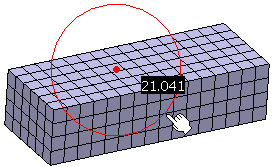
- Click again when you are satisfied with the
sphere diameter.
The bounding sphere is displayed and the
robot is automatically positioned at the selected
location.
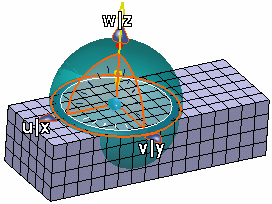
Use the sliders of the bounding sphere or the
robot to modify and move the bounding sphere. Click Apply to create and update the
group. Click OK.
The group is created and appears in the specification tree under
the Groups set, and the bounding sphere disappears.
If you created a group directly under an existing mesh,
the group is stored under the mesh in the Nodes and Elements set.
|
![]()


