Click Automatic Routing
 or select Tools > Conductor Routing > Automatic Routing.
Select the electrical physical system containing the conductors and conductor
groups you want to route.
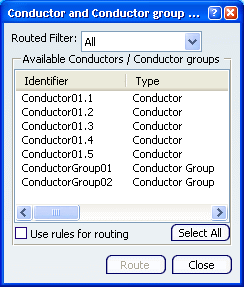
The Conductor and Conductor group Routing dialog
box appears listing existing conductors and conductor groups in the selected
electrical physical system.

For the conductors and conductor groups available in the
list, you get the following information:
- Identifier
- Type
- From
- To
- Routed: whether the conductor or conductor group is routed or not
- Route status
- External diameter
- Bend radius
- Separation code.
Select one or more conductors and/or conductor groups
Or,
Click Select All to route all listed conductors and conductor groups.
Click Route.
The Conductor and Conductor Group Import Report
dialog box appears.

Note: Selecting the conductors in the report dialog box highlights
the route in the geometry area.
Close the report dialog box.
Click Close in the Conductor and Conductor Group
Routing dialog box when done.