Adding a New Branch

You can add a new branch to the existing electrical branch geometry. A branch is a set of segments that share the same center curve.


Before you begin:
  • Create an electrical branch geometry and fully define the first branch (i.e. associate geometry and define route).
  • Do not select anything in the geometry area.
Related Topics
About Electrical Branch Geometries
  1. In the Electrical Part Design workbench, click Branch or select .

    The Branch Definition dialog box opens allowing you to define a second branch: Branch.2.

    Important: If you did not define the geometry and route of the first branch when you created the electrical branch geometry, the system edits the first branch. No new branch is added.

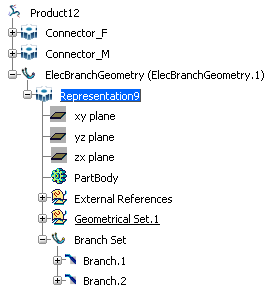
    The second branch is added to the specification tree under the Branch Set.


  2. Optional: Set the branch parameters.

  3. Click Route Definition and route the segment.

  4. Click OK in the Branch Definition dialog box when done.

    Branch.2 is fully defined with associated geometry and route.

    Note: If you click Cancel in the Branch Definition dialog box, Branch.2 is deleted from the specification tree as well as from the geometry area.