Click Start
 >
Infrastructure > Project Resource Management. The Project Resource Management Editor is displayed. >
Infrastructure > Project Resource Management. The Project Resource Management Editor is displayed.
Select the Create a new Resource Table contextual command of ElectricalFlatteningResources1.
The PLM Resource Set Custo dialog box is displayed.
Click Finish. The
ElectricalFlatteningResources1 window opens in which you can see the execution Business Rule, ElectricalFlatteningResources1, integrated in the synchronization process, with the EHFSynchronization_ExecutionOfUserSynchronization Opening ID.
In the Resource tab of ElectricalFlatteningResources1, select Choose the assigned resource in the contextual menu of Unset.

Search for the Business Rule in the ENOVIA database in the Select a Business Rule window in order to insert it in the Resource.
The execution Business Rule will be called at the end of the Synchronization or Extract commands. ThisObject: Electrical component from the 3D Flatten view. It can
be: Segment, Adaptable Protective Covering, Corrugated Tube Protective Covering, Protective Tape, Rigid Protective Covering, Single Insert Connector, BackShell, Shell, Equipment, Multi Insert Connector, Terminal Block, Terminal Strip, Stud, Splice, Contact, Wire, Wire Group, Product (to retrieve at least the support and the mechanical part), feature for generic behaviour, or VPMInstance.
Parameters:
- Standard context:
- Severity 1 (default) to raise a warning and the operation can continue.
- Severity 2 to raise an error and the operation is undone. Message: attribute, displayed in a warning or error message depending on Severity, if the validation fails.
- Electrical Harness Flattening context: Object3DDesignHarness : Reference object which is the mapping component of the 3D Flatten component in 3D Design harness (can be NULL if the link is unset).
- SynchronizeExtractContext: a Boolean value giving the context of synchronization.
- True: it is a Synchronization of existing 3D flatten harness.
- False: it is an Extract-Synchronization.
- Simulation mode: a Boolean value providing the simulation mode value.
- True: the simulation mode is activated.
- False: the simulation mode is not activated.
- SynchronizationModification: a Boolean value providing the information that the 3D Flatten component is modified, or not during Synchronization.
- True: the electrical component has been modified during Synchronization.
- False: the electrical component has not been modified during Synchronization.
- Length Tolerance: a Boolean message explaining that the segment has a Length Tolerance applyied on it. This attribute is provided only for segment component.
- True: the segment has a Length Tolerance
- False: the segment does not have Length Tolerance.
In the initial design data, select a segment and modify its length,
diameter, bend radius, instance name or color.
Save your data.
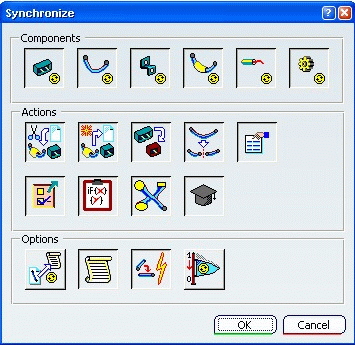
Switch back to the extracted data. Click Synchronize .

Press the Synchronize the Knowledge parameters button  to activate the execution business rule. to activate the execution business rule. When it is activated, the rule is launched on the component (Segment, Devices, Support, Protective Covering, Wires) that it is taken into account by the synchronization. The About the HTML Report shows the activation of Business Rule:

If there is an error, a message (Severity 1 or 2) appears in the HTML Report.

|