Rotating Elements | |||||
|
| ||||
Click Rotate
 in the Operation toolbar (Transformation sub-toolbar).
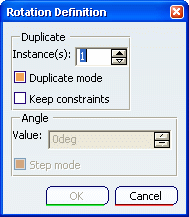
The Rotation Definition dialog box appears and will remain displayed all along the rotation.
Select the geometry to be rotated. Here, multi-select the entire profile.
Select or click the rotation center point. You can also enter a value in the fields displayed (Sketch tools toolbar), or also enter a value for the rotation angle in the Rotation Definition dialog box.
Select or click a point to define the reference line that will be used for computing the angle.
Select or click a point to define an angle.
Click OK to end the rotation. Rotating elements also means re-computing distance values into angle values, if needed. Be careful: only non-fixed elements are updated. Internal constraints are preserved. As for external constraints:
- geometric constraints are killed
- dimensional constraints are modified and revalued.