Select a face on the model.
The heat flux will be applied across the entire highlighted region.
In the balloon, select heat flux  . .
To define the heat flux magnitude: - Click the existing magnitude.
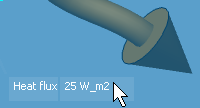
- Type a new magnitude into the text field.
- Press Enter or click the background of the viewport to commit the magnitude.
To complete the heat flux definition:
- Click the background to commit the heat flux, or
-
Click a new face to commit the current heat flux and begin a new heat flux definition.
To edit a heat flux after it has been created, double-click the heat flux's glyph in the model. To delete a heat flux, click its glyph and press [Delete]. The Review Panel can also be used to edit or delete a heat flux.
|