Create a Track
You can create tracks within a scenario.
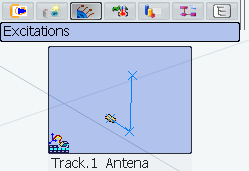
In the immersive browser, click Excitations
 , right-click in the Excitations title bar, and select New Track.
The Track: Anchor Positioning dialog box appears.

Click Next in the Track: Anchor Positioning dialog box.
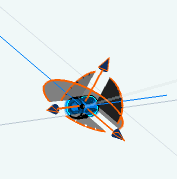
- A compass attaches itself to the part you selected (if you have selected multiple parts, the compass is attached to the first part selected).
- The following elements appear:
- The Track Authoring balloon
- The Simulation Player
- The Track: Track Authoring dialog box appears.
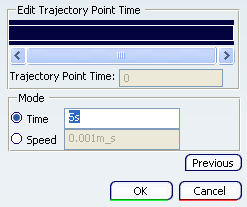
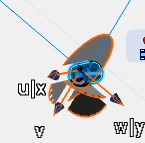
On the part data, move the 3D compass and click Record
 at each
position.
at each
position.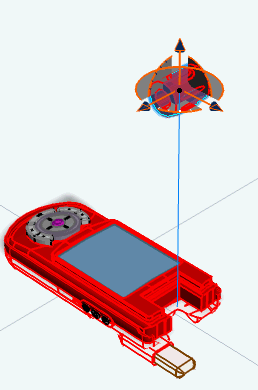
The trajectory line has one color (blue, by default) when you have recorded it, and another (green, by default) when you have moved the data but not yet recorded it.
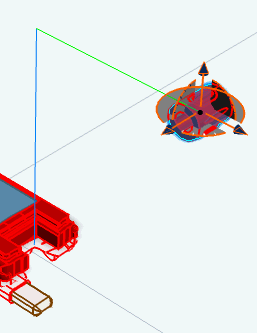
Click on a trajectory point you have created.
The data moves from the most recently created point to the point you clicked.
Click Modify
 and move the compass to all the trajectory point's position, then click Modify
again.
and move the compass to all the trajectory point's position, then click Modify
again.The track is modified.
Click Delete
 .
.The trajectory point is deleted, and the track is modified.
When you have recorded the track, click OK in the Track: Track Authoring dialog box.
The track is created under the Excitations.
![]()
Create a Track for an Operation
You can create a track in an operation in work plan mode.
Open the data in workplan mode.
Right-click the operation to which you want to add the track and select Switch to Behavior .
The behavior(s) associated with the operation appear.
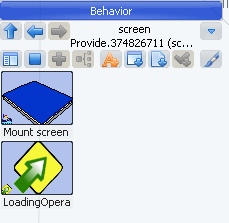
Right-click on the behavior on which you want the track created and select Create Track.
The Track: Anchor Positioning dialog box appears.
The products implemented by the operation and the used resource implementing the operation are automatically selected.
Notes:
Either all or none of the implemented products are managed by the track. Click on an implemented product to deselect all of them.
If a track is defined with implemented products as moving objects, track simulation always moves all the implemented objects defined on the operation (even if the implement products are modified by the operation).
You can select products and implemented resources to remove or to add to the selected objects for the track.
Only the implemented resources you select when you create the track are defined as moving objects for this track. Additional implemented resources defined on the operation are not taken into account for track simulation.
You have to edit the track to add/remove the implemented resources for the existing track.
Depending on what you have set in , the part position for the track is set relative to the other objects' positions in the operation (the default), or the position is set relative to the object's design position. See: Assembly Path Definition.
Click Preview
 .
.The Tool Selection Assistant dialog box appears.

The selected manufacturing assemblies and resources are the ones implemented by the operation. The available manufacturing assemblies and resources are those implemented by the operations before the current operation.
Click Next in the Track: Anchor Positioning dialog box.
- A compass attaches itself to the part you selected (if you have selected multiple parts, the compass is attached to the first part selected).
- The following elements appear:
- The Track Authoring balloon
- The Simulation Player
- The Track: Track Authoring dialog box appears.
Move the 3D compass and click Record
at each
position until you have created a track.

![]()
Selecting Objects to Move with Tracks
You can select multiple objects to move with tracks.
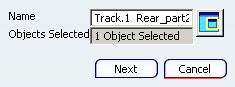
Open a simulation, and from the Excitations tab, select New Track. The Track: Anchor Positioning dialog box opens.
On the 3D geometry, select the product data you want to move.
If you are not certain you have selected precisely the product data you want to move (e.g., if you want to be sure you have selected an entire subassembly, and not only one of its constituent parts), press F3 to see the tree. You select the data directly on the tree.
In the Track: Anchor Positioning dialog box, Objects Selected indicates that you have selected an object.
If the preview window is not already available, click Open Preview Window
.By default, the preview window is not available. You can alter the setting in the Assembly Path Definition so that it is always available or you can use Open Preview Window
when you require the preview window.The Preview Window appears.
Select more than one item and check the objects selected in the 3D tab.

Click Next.
The Track: Track Authoring dialog box appears.
Once you have selected the objects for the track, you can begin to record trajectory points.