Creating a Kinematic Track | ||
| ||
Create Kinematic Track in Simulation
You can create a kinematic track within a manufacturing simulation.
In the immersive browser, open data that contains at least one kinematic device that is part of a manufacturing simulation.
In the immersive browser, click Excitations
 , right-click in the Excitations title bar, and select New Kinematic Track.
If there is more than one possible mechanism to select, the Kinematic Track: Mechanism Selection dialog box appears.
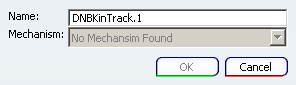
Note: If only one valid kinematic mechanism is available from the implemented products, the Kinematic Track dialog box, the Track balloon, and the Simulation Player appear (see below).
Select the mechanism and click OK.
The Track balloon, Simulation Player, and the Kinematic Track dialog box appear.
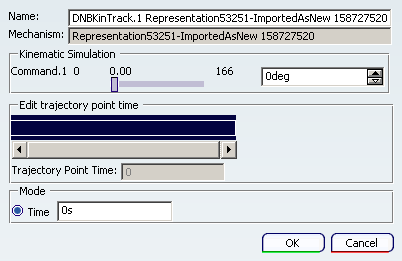
To create the track, clickRecord
 to establish the first trajectory point in the track.
This point cannot be modified.
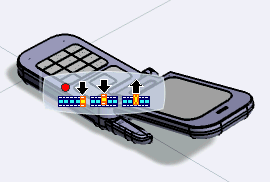
Manipulate the slider next to Command under Kinematic Simulation or use the arrows to refine the movement more precisely. When you arrive at the trajectory point you want to create, clickRecord
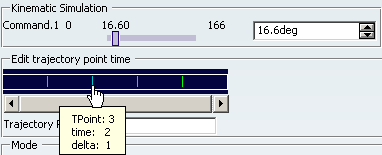
.The 3D data moves as you manipulate the slider and the second trajectory point (TPoint) appears under Edit trajectory point time.

Note: No representation of the trajectory appears on the 3Ddata.
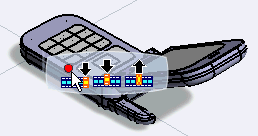
Use the slider and Record
to create three or four trajectory points.Select the second point on the Edit trajectory point time (TPoint: 3).
The color of the selected point turns from green to blue.
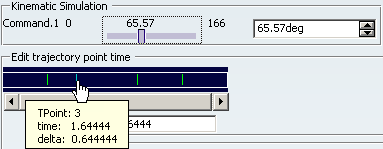
Use the slider or arrows to modify the position of the selected point; click Modify
 . Then move the point to alter the time; click Modify
.
. Then move the point to alter the time; click Modify
.Each of the modifications is kept.
Note: If you click OK instead of Modify
, the last change you made is retained.Select a different point, and click Delete
 .
.The point disappears in Edit trajectory point time.
![]()
Create Kinematic Track in Work Plan Mode
You can create a kinematic track when you are in work plan mode (i.e., when you have PPR context data that is not part of a manufacturing simulation).
Open data that contains at least one kinematic device in a PPR context.
On the tree, select an operation with a product assigned that contains at least one mechanism and on the menu, select .
If there is more than one possible mechanism to select, the Kinematic Track: Mechanism Selection dialog box appears.
Note: If only one valid kinematic mechanism is available from the implemented products, the Kinematic Track dialog box, the Track Record balloon, and the Simulation Player toolbar appear (see below).
Select the mechanism and click OK.
The Track Record balloon, Simulation Player toolbar, and the Kinematic Track dialog box appear.
Note: In work plan mode, you cannot change the product selection. All the implemented products of operation are considered for the kinematic mechanism by default .
If more than one valid kinematic mechanism is available from the implemented products, you first get a Kinematic Selection dialog box.
To create the track, move the slider from one end towards the other, stopping at each spot you want as a trajectory point and clicking Record
, then moving to and recording the next trajectory point until you have completed the track.Note: For details on using the Track Record balloon commands with the Kinematic Track dialog box, see Creating a Kinematic Track.
When you are done creating and refining the kinematic track, click OK.
The track appears as a behavior for the operation in both the tree and under Behavior in the immersive browser.
