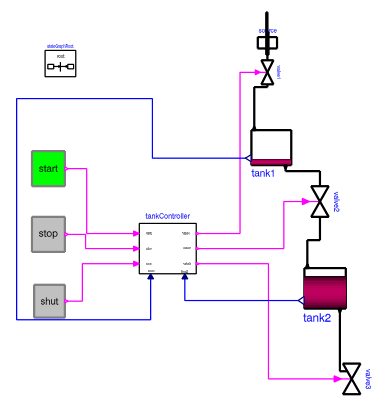
Open the Modelica Standard Library and from the Package Browser select Modelica.StateGraph.Examples and then double-click ControlledTanks.
The ControlledTanks diagram opens.
Click Execute with User Interaction  in the Execution
toolbar.
- The Simulation Player toolbar is displayed.

- Jump to begin
 : Stops the simulation animation and resets the timer to zero.
- Pause
 : Pauses the simulation.
- Play Step Forward
 : Plays the simulation animation one step at a time.
- Play Forward
 : Plays the simulation animation from the current position.
- Play Interval Forward
 : Plays the simulation animation one interval at a time (define the interval in the box by using the arrows or by entering a number).
- If necessary, the Messages Reporting dialog box is displayed in the diagram area.
Click Play Forward and watch the simulation animation in the 2D diagram. Note the animation of the start, stop and shut buttons and the level of liquid in the tanks.

Click Jump to begin to stop the simulation animation and reset the timer to zero.
Run the simulation animation one step at a time by clicking Play Step Forward repeatedly.
At any stage in this process you can interact with the diagram by clicking a button (start, stop or shut) in the 2D diagram.
At the next click of Play Step Forward , the state of the button you clicked will be changed.
In a more complex model, this may lead to a change in the value of other variables.
When finished, to end the execution, click Execute with User Interaction  in the Execution
toolbar or close the Simulation Player toolbar.
The Variable Browser is displayed in the Dock. The Variable Browser shows records of component behaviors and all interactions made during the course of the simulation with user interaction.