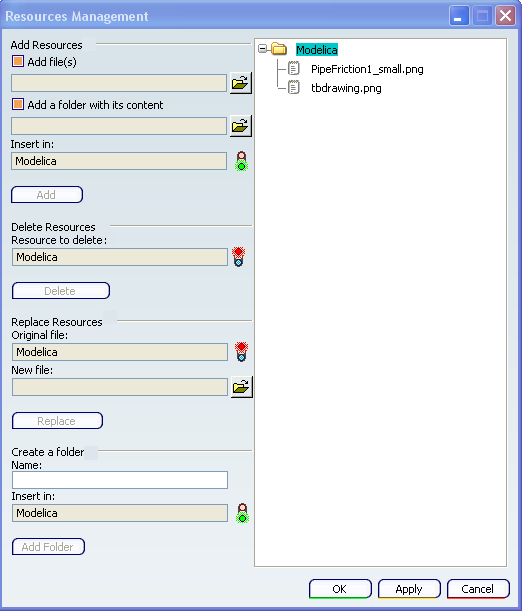
From the Authoring toolbar, select Resources Management . . A Resources Management dialog box appears.

To add a file: - Check the Add file(s) option.
- Click Browse next to the Add file(s) field.
A Select files dialog box appears.
- Select the file you want to add and click Open to validate your selection and close the Select files dialog box..
- Click Add.
The selected file is added into the library folder.
To add a folder along with its content:
- Check the Add a folder option.
- Click Browse next to the Add a folder field.
A Select files dialog box appears.
- Expand until the required folder and click Open to validate your selection and close the Select files dialog box.
- Click Add.
The path until the selected folder appears in the Add a folder field.
To remove a resource: - Select a file or a folder from the library.
The name of the selected file or directory appears in the Resource to delete field.
- Click Delete.
The selected file or folder is removed from the library.
To replace a resource: - Select a file from the library.
The selected file appears in the Original File field.
- Click Browse.
A Select files dialog box appears.
- Select a file then click Open to validate your selection and close the Select files dialog box.
- From the Resources Management dialog box, click the Replace button.
The selected file replaces the original file and appears in the New File field.
To create a folder: - Select a folder from the library.
The selected folder appears in the Insert Infield.
- Enter a name for the new folder.
- Click Add Folder.
The created folder is added into the selected folder.
|