Install the Modelica library ExternalInterfaces.
This library is in the file ExternalInterfaces_*.3dxml which is located in your install repository (typically \intel_a\resources\3DXMLData\). If necessary, refer to Related Topics for help on installing libraries.
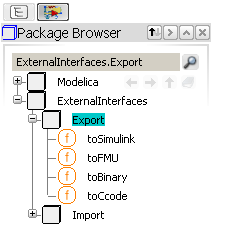
The ExternalInterfaces library is added to the list in the Package Browser.
From the Package Browser select .

To export to Source Code, do one of the following:
- In the tree under Export, click toCcode and then in the menu bar select
- In the tree under Export, right-click toCcode and then select
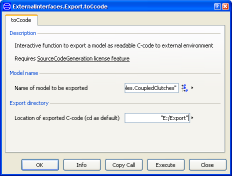
The ExternalInterfaces.Export.toCcode dialog box is displayed.
To export to Binary, do one of the following:
- In the tree under Export, click toBinary and then in the menu bar select
- In the tree under Export, right-click toBinary and then select
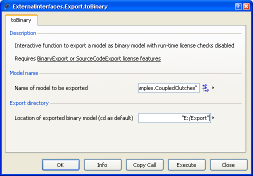
The ExternalInterfaces.Export.toBinary dialog box is displayed.
In the Model name area of the dialog box, click  and in the Select Model dialog box which appears select the model you want to export and then click OK.
If you click the arrow at the end of an input field you can also Edit Text in a separate dialog box and Copy Default values. The default value is specified in the text view of the function; for example the default value for the exportDirectory parameter is given by input String exportDirectory= "" (see Related Topics for more information about editing Modelica text).
The model name is added to the dialog box.
In the Export directory area of the dialog box, enter "E:/Export".
In this example, the data for Modelica.Mechanics.Rotational.Examples.CoupledClutches will be exported to the E:/Export folder.
| Export to Source Code |
Export to Binary |
|---|

|

|
Do one of the following:
- Click OK: The export function is started and when it has finished the dialog box closes.
- Click Info: A dialog box is displayed which gives a summary of the export parameters.
- Click Execute: The export function is started and when it has finished the dialog box remains open.
- Click Copy Call: The export function and its parameters are copied to the clipboard. You can then paste them into the scripting command window or into a script (.mos) file.
- Click Close: The export function is dismissed and the dialog box closes.
If you click OK or Execute:
- The Modelica Scripting Window dialog box is displayed and shows the status of the function.
- The results are computed and exported.


