Managing User-defined Toolbars | ||||
|
| |||
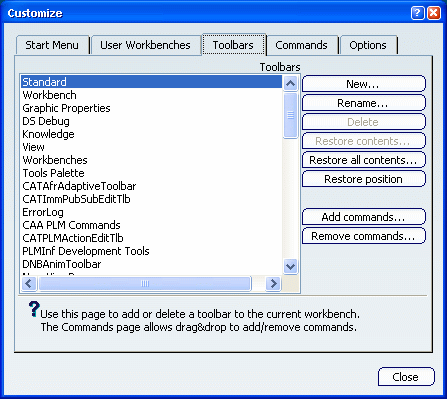
In the Customize dialog box, access the Toolbars tab (if not already activated).
The currently available toolbars are listed:
Note: The default contents or position of toolbars are the contents or position the toolbars have, when the user starts the software for the first time after installation.
Click New... to create a new toolbar.
The New Toolbar dialog box appears with a default toolbar name, and an empty toolbar appears:
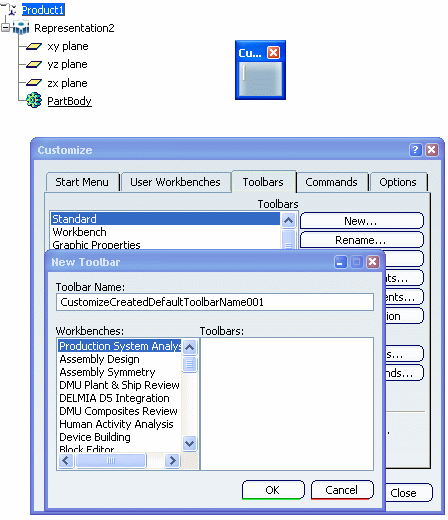
Enter the name of the new toolbar, then click OK.
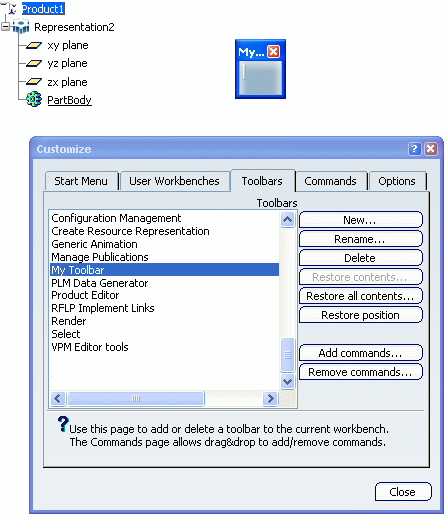
The new toolbar is added to the bottom of the list, and an empty toolbar is added to the right of the main application window.In our example, the toolbar "My Toolbar" has been added to the list:
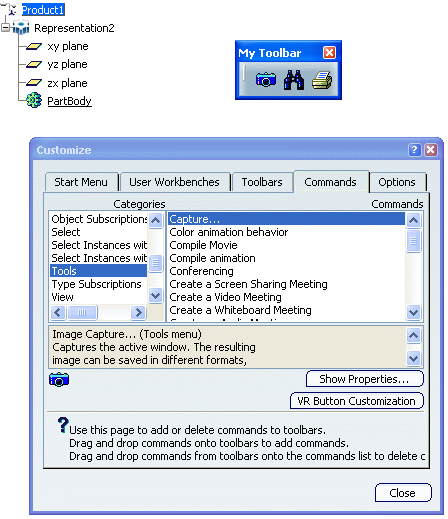
Click the Commands tab and drag and drop commands onto the new toolbar.
In our example, the toolbar "My Toolbar" contains three icons: