Recording Interactions in Video Format | |||
| |||
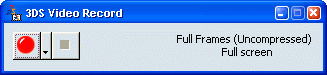
The current video format and the compression mode are indicated:
And the 3DS Video Record item is added to the Windows taskbar:

To setup the video capture parameters, click the arrow next to Record or pause
 then select Configuration.
Optional: Click the
 button if you do not want the number of frames when capturing and replaying the video to be synchronized.
 When recording in non-synchronized mode, the button looks like this:

In the Cursor options list, indicate the cursor should be captured or not by selecting the appropriate option.
Selecting Highlighted means that the cursor will be captured and highlighted as follows:
- Cursor without any click

- Cursor with simple click

- Cursor with double-click
 .
.
- Cursor without any click
Click Save.
The player dedicated to the selected compressor opens to replay the video.
For instance, if Full Frames (Uncompressed) has been selected, the Windows Media Player opens:

Important: On Windows 64-bit, the video is replayed through the V6 player to make sure that the codec used is the one of the 64-bit recorder.
 to stop the recording.