Capturing Selected Areas of Images | |||||
|
| ||||
Capture a Screen Area
This capture mode lets you perform an extended selection of images, which is especially useful to capture several windows, splitted windows or dialog boxes simultaneously, for instance. It is the only possible mode to capture several viewers.
In the Capture Configuration dialog box, define the general configuration options of your choice.
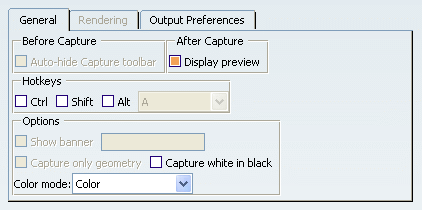
Important: The Rendering tab is grayed out because it does not apply to this capture mode. Click Capture
 .
.The Capture toolbar is now entirely grayed out.
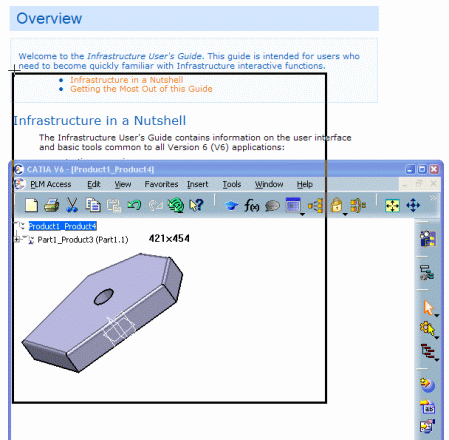
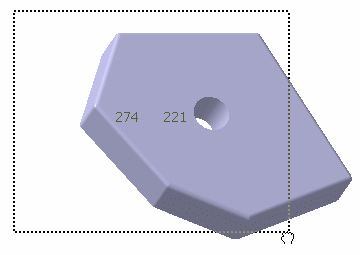
Click in the geometry area and drag to create a bold bounding outline around the area to be captured.
You can select any elements of the screen, not only those displayed in the V6 application window.
As you drag, the height and width of the outline you are drawing (expressed as the number of pixels) are displayed:
Release the mouse button:
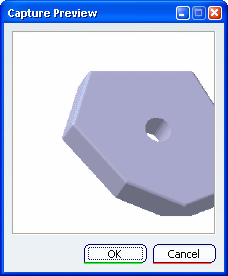
A preview of the captured image is displayed in the Capture Preview window:
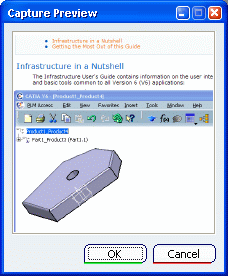
Click OK if you are satisfied with the capture, otherwise click Cancel (in that case, you are not prompted to save or print the captured image).
If you click OK, the Capture Preview window is closed and additional windows might open according to the output preferences you selected.
Important: As soon as the Capture Preview window opens, you exit the Screen area capture mode. To restart capturing selected areas of images, select Screen area  again in the Capture toolbar.
![]()
Capture a Window Area
This mode captures the contents of the V6 application window only. It applies within one viewer and do not capture outside the target viewer.
In the Capture Configuration dialog box, define the general configuration options of your choice.

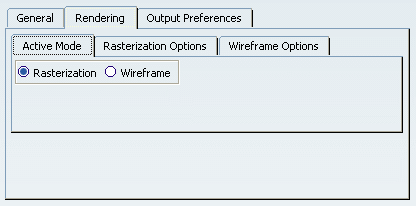
Access the Rendering tab:
Click Capture
.The Capture toolbar is now entirely grayed out.
Click in the geometry area and drag to create a bounding outline around the area to be captured.
As you drag, the height and width of the outline you are drawing (expressed as the number of pixels) are displayed:
Release the mouse button.
A preview of the captured image is displayed in the Capture Preview window:
Click OK if you are satisfied with the capture, otherwise click Cancel (in that case, you are not prompted to save or print the captured image).
If you click OK, the Capture Preview window is closed and additional windows might open according to the output preferences you selected.
When finished, you can see that the bounding outline now displays handles and a symbol in the center:
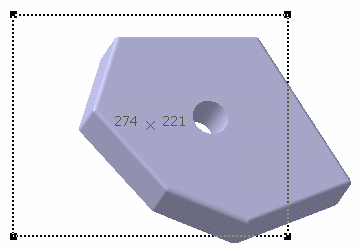
Important: These handles let you:
- Drag the outline by dragging the "X" symbol at the center of the outline.
- Resize it by dragging the handles at each corner, or the sides of the outline.
 .
.