Creating Multi-Domain Constraint Areas | |||||
|
| ||||
Draw the outlines of all areas making up the multi-domain constraint area.
To do so:
- Click Sketch
 .
. - Select the board or panel to define the working plane.
- Click Profile
 and draw multiple contours.
- Click Exit workbench to return to Circuit Board Design.
- Click Sketch
Create the shape for the multi-domain constraint area.
Note: To do so:
- Click Pad
 . The Pad Definition dialog box appears.
- Enter 8mm in Length.
- Click OK to validate.
- Click Pad
Click Constraint Area
 .
.
The Constraint Areas dialog box opens.
For information on available types, see Creating Constraint Areas.
Select the type and click OK.
Constraint areas are transparent. The color depends on the type selected. The color can be changed in Tools > Options... > Equipment and Systems > Circuit Board Design > Graphic.
Constraint areas are grouped by type in the specification tree.
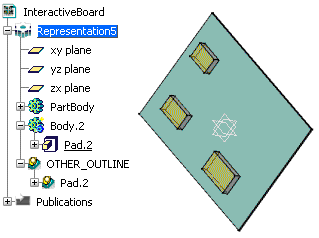
Note: The pad is more than a simple pad. It has technological properties.
Tip: Alternatively, use a pattern to create multi-domain constraint areas.