Writing Command Values of Mechanisms | ||||||
|
| |||||
Write Command in SFC+
You can program a Write Command activity in SFC+.
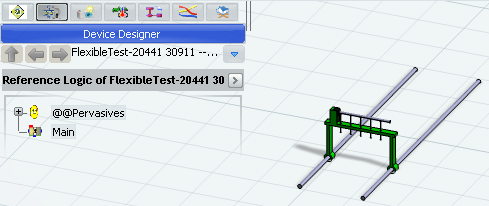
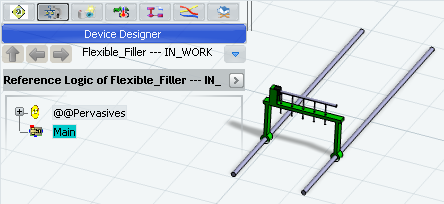
Open a device that has a previously-defined mechanism, motion controller and a Simulation Logic. The Main block must be a SFC+ block (see a typical example below).
To open the SFC+ Editor, do one of the following:
- Expand the content of the Main block and double-click Behavior.
- Right-click the Main block and select Behavior Editor.
- Select Behavior Editor
 in the Main window toolbar.

- The SFC+ Editor appears as an immersive window at the center of the screen.
- A toolbox containing all the SFC+ Editor commands appears at the right side of the screen.
Note: In our example, the resource logic is undefined, so the editor is empty.
Select Write Command
 in the Activities toolbar and click the 2D immersive window to position the Write Command action.
The Command Properties dialog box appears:
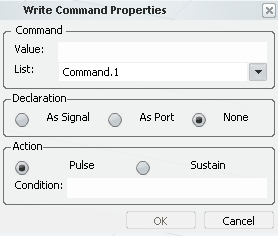
- In the Data frame, you can define the value of one mechanism command.
- In the Declaration frame, you can choose to create the port or the signal used in the Value box.
- In the Action frame, you can define the settings of the Write Command action.
Click OK.
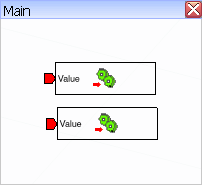
The step S0 is created in the SFC+ graph. The action calling the Write Command activity is identified by the icon
and the command name. 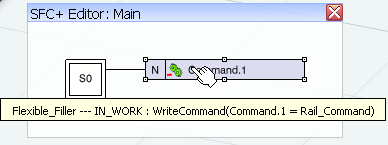
Tip: To have more details about the action, scroll-over it to display the tool tip. Create a new Write Command activity to pilot the second command:
- Select Write Command in the Activities toolbar and click the 2D immersive window to position the Write Command action.
The Command Properties dialog box appears.
- Select Command.3 in the list.
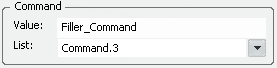
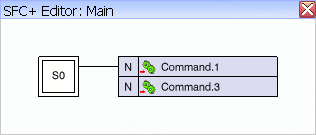
A new Write Command action is added to the step S0.
- Select Write Command
To test the behavior of the activities in simulation:
- Select the Main block and click the Play
 of the compass.
The block is compiled and the simulation is initialized. The Simulation toolbar and the Signals Monitoring window appear.
- Expand the ports of the Main block in the Signals Monitoring window.
- Enter the value of the commands in the Force Value cells.
- Click Next
 .
.The commands moves to the defined target values.
- Select the Main block and click the Play

![]()
Write Command in Dataflow
You can program a Write Command in Dataflow.
Open a device that has a previously-defined mechanism, motion controller and a Simulation Logic. The Main block must be a Dataflow block (see a typical example below).
Double-click the Main block.

- The Block Editor appears as an immersive window at the center of the screen.
- A toolbox containing all the Block Editor commands appears at the right side of the screen.
Note: In our example, the resource logic is undefined, so the editor is empty.
Click Write Command
in the Activities toolbox.
Then, click the Block Editor window to position the activity.
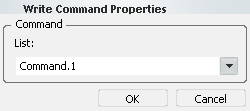
The Write Command Properties dialog box appears.
Click OK.
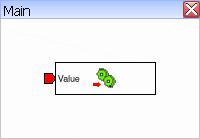
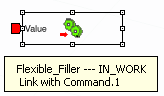
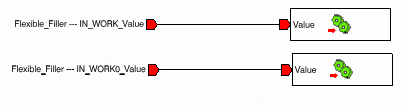
- The activity is created as a block instance.
- Value (type float 64) is the command value of the mechanism.
Scroll_over the instance to see the Write Command activity parameter.
Create a new Write Command activity to pilot the second command.
-
Click Write Command in the Activities toolbox.
Then, click the Block Editor window to position the activity.
The Write Command Properties dialog box appears.
-
Click Write Command
Press Ctrl and select in the ports contextual menu.
To get shorter port names,
- Modify the name of the ports.
- Modify the name of the ports.
To test the behavior of the activities in simulation:
- Select the Main block and click the Play of the compass.
The block is compiled and the simulation is initialized. The Simulation toolbar and the Signals Monitoring window appear.
- Click Next in the compass.
Note: The commands are not changed. In Dataflow, the activities are enabled only if the input values are emitted.
- Enter the values of the commands in the Force Value cells.
- Click Next in the compass.
The commands moves to the defined target values.
- Select the Main block and click the Play of the compass
