Building a State Chart | |||||
|
| ||||
Build a Simple State Machine
To build a state chart, you first build a simple state machine.
Click Add State
 in the State Chart Tools
toolbar, then click a spot in the editor where you want to place the
new state. It is created in the chart with a double circle: the first
state created in a graph is initial. You can change this, and the state
properties by double-clicking it:
in the State Chart Tools
toolbar, then click a spot in the editor where you want to place the
new state. It is created in the chart with a double circle: the first
state created in a graph is initial. You can change this, and the state
properties by double-clicking it: 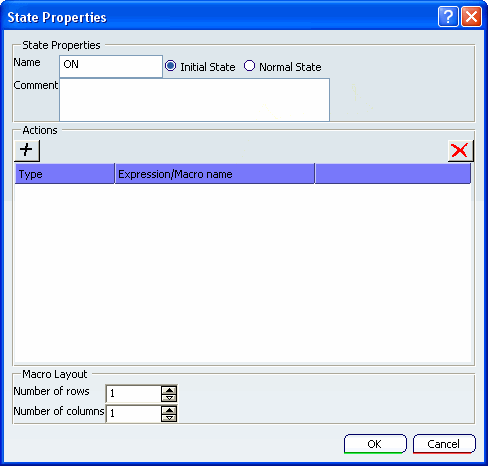
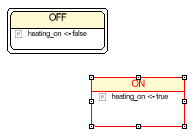
Add a second state in the chart, to represent the mode OFF. The chart displays a warning at this step of the construction because one state is not linked by a transition:
Add actions to a state in the properties window of the state by clicking on the + sign. The image below shows how to associate the action of setting the signal heating_on to false with the state OFF:

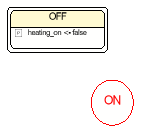
Click OK. A state with an associated action is represented like this:
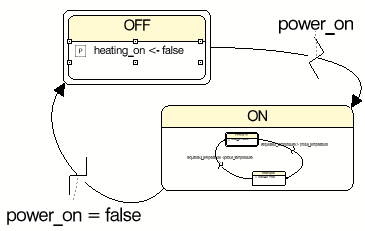
If you repeat this procedure for the other state, you get the following result:
To add transitions between the two states, click Add Transition
 in the State Chart
Tools toolbar. Select the source state in the chart, then the
target state. This results in the following:
in the State Chart
Tools toolbar. Select the source state in the chart, then the
target state. This results in the following: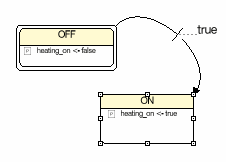
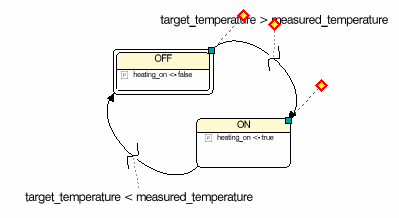
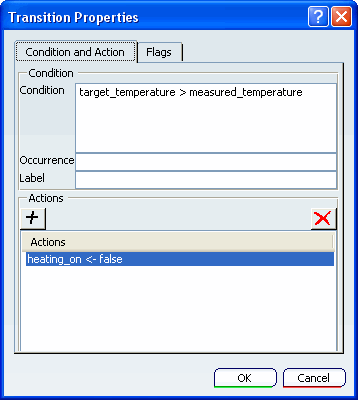
The default condition for a transition is the expression true. Conditions on transitions belong to the property of the transition. To change them, double-click on the transition, and enter the Boolean expression you need for the condition:
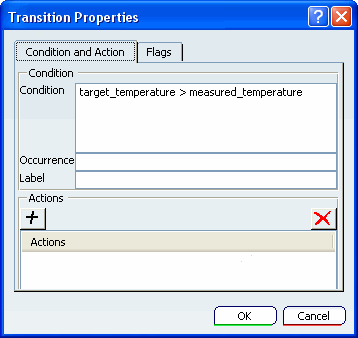
You can also set flags for the transition, by clicking on the Flags tab. These flags are the same as the ones used in the SFC+ formalism, you can refer to their definitions in Sequential Function Chart (SFC+).
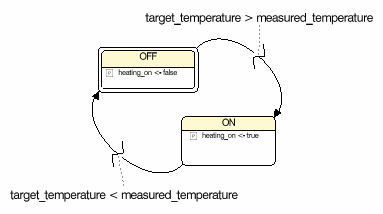
Once completed, the state machine looks like this, and can be simulated.
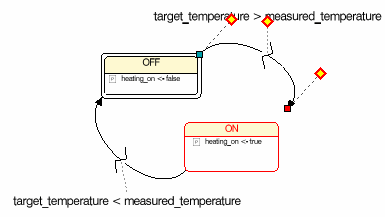
You can change the layout of a transition. Select a transition, five handlers appear: two at the transition extremities (green squares), two on the transition and one on the condition text.
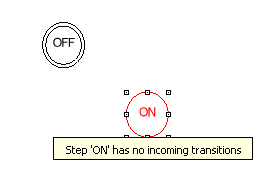
The two extremity handlers are used to connect and disconnect the transition to a state. When the two extremities are connected, handlers appear in green (like in the picture above). The image below is the same chart with the link unconnected. The handler is red, the state ON is red as well because it has no incoming transition:
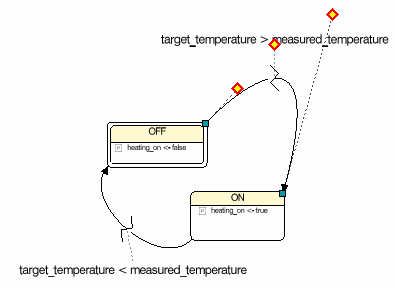
The two orange handlers are used to change the curve:
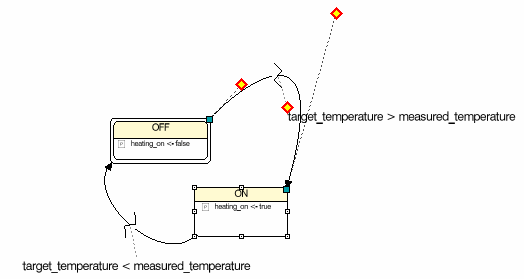
The handler of the condition text is used to move the text:
![]()
Use Hierarchy by Running and Pre-empting a Block Instance
Once the block is created, you can use the hierarchy by running and pre-empting a block instance.
More specifically, the THERMOSTAT block is ready. Now you are going to use and trigger the thermostat inside the behavior of the heating controller.
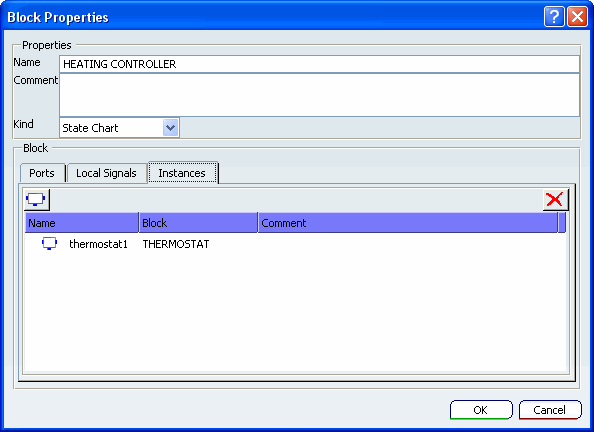
Declare one instance of the block THERMOSTAT in the HEATING CONTROLLER block.
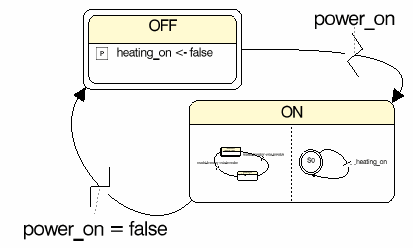
Open the State Chart Editor for the block HEATING CONTROLLER, and run the instance thermostat1 in the state ON. To do this, display the properties of the ON state and add an action by clicking on the + sign. Select Run from the action types list:
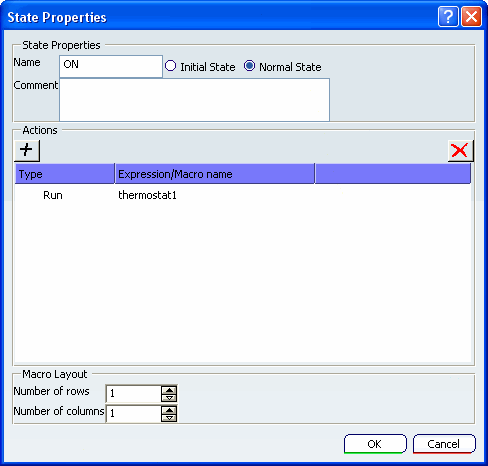
Click OK: your chart now looks like this:
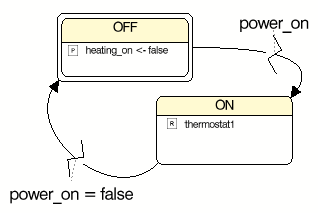
This means the following:
-
When run, the block HEATING CONTROLLER starts emitting the signal heating_on with the value false. When the input power_on has the value true, the state OFF is de-activated and the state ON is activated. The instance thermostat1 is run.
-
When the input power_on is set to false, the state ON is deactivated, thus the instance thermostat1 is killed.
You can get more details on how this specification works cycle-by-cycle according to input changes (especially with transition flags choices) in Sequential Function Chart (SFC+).
Note: You can run as many block instances as you want within a state. When the state is active, they are all run in parallel.
-
![]()
Use a Hierarchy with a Macro
Instead of running a block, you can design behavior by using a macro. You can design the previous behavior with the same specification by using a macro instead of running a block instance. This is useful if you don't need to reuse the code of the macro (a macro is a piece of behavior that is not reusable), and might in some cases, enhance readability of a chart.
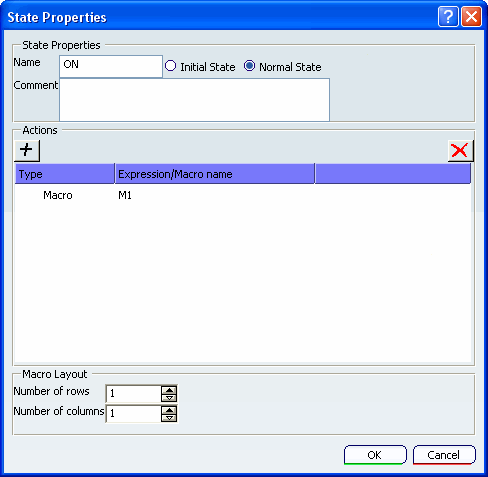
Add a macro action in the state ON by editing its properties and adding an action type macro, then click OK.
Note: The name of the macro is optional.
Author the macro state by editing it: double-click on the macro area in the state representation.

You are now in a blank page, and you can build the macro. Here is how a state machine looks with a macro:
Note: You can add as many macros as you want within a state. When the state is active, they are all executed in parallel.
Here is how the previous graph would look with two macros in the state ON:
![]()
Associate Actions on Transitions
You can associate simple actions (that is, a simple signal emission: a pulse action) to transitions.
Double-click on a transition to edit its properties, and add an action in the Actions area:
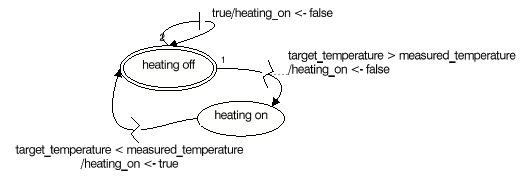
Click OK to set the properties. Conditions and actions are separated by a slash in the chart. Below is another way to represent the block THERMOSTAT with actions on transitions: