Using the 3D Session Grid

You can create 3D session grid once and use it multiple times. The 3D Session Grid commands provide tools letting you create and manipulate the 3D grid. At times when it is not required you can hide the grid.

This task shows you how to:


Before you begin:
  • Assign all the resources from Common Geometry Resource in Project Resource Management.
  • Insert Project Data in the 3D session.
Related Topics
More About 3D Session Grid

Create the 3D Session Grid

You can create the 3D session grid.

  • Click 3D Session Grid - Create in the Grid Tool toolbar.

    This command does not have a dialog box, it executes the creation of the feature 3D Session Grid. The creation of 3D session grid relies on the existence of a project data containing three sets of reference planes.

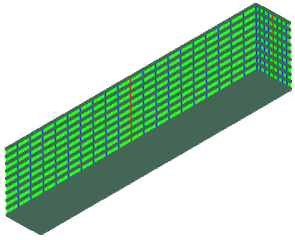
A grid created using the maximum available planes as represented below. The Grid is made of three faces.
Important:
  • The size and spacing of session grid is dependent on the Reference Plane Systems resource assigned in Common Geometry Resource in Project Resource Management.
  • If the command is executed N times, the system creates N 3D session grid.
  • This operation is possible inside a structure system or inside any representation (after the context command is used).
  • Usually the administrator does this one time and saves the result inside the reference geometry representation. However, it is possible to create 3D session grid in each structure systems.

Manipulate the 3D Session Grid

The manipulation of a session grid is persistent across sessions.

Important: The manipulation data is saved in the RFGSettings.CATPreferences file. Since the manipulation of a session grid does not affect the 3D grid feature, multiple users can have a different manipulation thus a different visualization of the session grid. This is because each user has its own RFGSettings file. If RFGSettings.CATPreferences is deleted, the manipulation of the session grid is lost. The session grid will display in its original state.

Flipping a Face of the 3D Session Grid

You can redraw the grid with the opposite face active. For instance face Y becomes face (-Y).
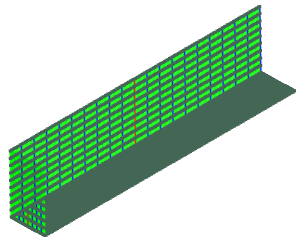
  1. Click 3D Session Grid - Manipulate in the Grid Tool toolbar and select the grid to manipulate.

    Manipulators are displayed on the grid faces.

  2. Click Flip Grid Face to flip the face of session grid.


Shrinking and Stretching the 3D Session Grid

You can drag the 3D session grid to shrink or stretch it.

  • Select a grid face and drag it.

The grid size varies accordingly.
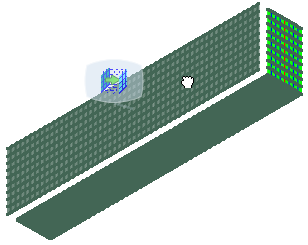
Important: The maximum size of the session grid is dependent on the Reference Plane Systems resource assigned in Common Geometry Resource in Project Resource Management.

Annotation in the 3D Session Grid

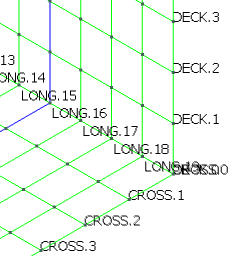
You can hide or show the annotation in the 3D session grid.

  • Click Hide/Show Labels to hide or unhide the annotation


Hide/Show 3D Session Grid

It is possible to hide or show the 3D session grid.

  • Click 3D Session Grid - Hide/Show in the Grid Tool toolbar to hide/show the grid.

Important:
  • To use this functionality, it is necessary to set the 3D session grid as the Common Geometry Reference.
  • Also, it is necessary to set the SessionGridName in Common Geometry Resource.
  • Only the grid declared in Project Resource Management can be made visible or invisible using this command.