Creating a Bump Mapping for 2D Textures

You can create a bump mapping effect when applying 2D textures.

Bump mapping is a lighting surface effect, based on a texture, that locally modifies the geometric aspect of the basic object by means of an artificial perturbation of the surface normals. These normals are vectors perpendicular to the surface defining the orientation of the surface.

Bump mapping cannot be visualized in real time display, it is used for rendering purposes only.


Before you begin: Make sure you select a product with a material already applied to it.

For more information on how to create materials refer to Creating Materials in the Material Editor User's Guide.

  1. Right-click the material behavior in the specification tree then select xxx_Rendering object > Definition to display the Rendering Properties dialog box:


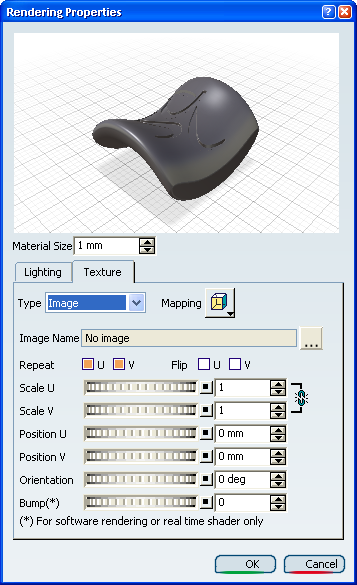
  2. Use the Bump slider (or enter the desired value directly in the field) to set the bump amplitude to be applied to the mapped texture. You can enter values comprised between -1 and 1:


    • 0 means no bump effect
    • 1 means that bright colors appear above dark colors
    • -1 means that dark colors appear above bright colors.

  3. Click OK when satisfied with your parameters.