Creating a Rendering Scene | ||
| ||
In the Scene Editor toolbar, click Create a Rendering Scene
 .
.
The Rendering Scene Creation dialog box is displayed:
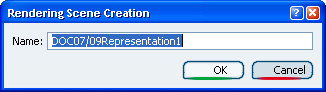
A default name is given to the rendering scene in the Name field. This name consists of the Prefix you defined earlier in PLM Access... > Creation Preferences followed by Representation xxx.
Click OK to validate. A new rendering scene appears in the specification tree under the name you have given it.

Important: If you create cameras, environments, stickers and lights without previously creating a rendering scene, a default rendering scene is created in the specification tree. It has a default name that you can modify by accessing the properties of the Rendering Scene. Tips: - You can create several rendering scenes. This will allow you to handle more easily you environments, lights, cameras, stickers and rendering materials. For instance, for each rendering scene you can assign a different context, i.e. a particular environment with specific lights associated to it, etc.
- To visualize or hide a rendering scene, right-click the rendering scene in the specification tree and select Hide/Show.