Creating Route Using the Insert Point Command | |||
| |||
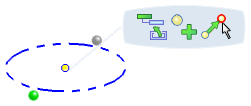
Click Rigid Route
 in the Compass Toolbar.
The 3D Part / Product DS dialog box appears.
In the balloon, click Insert Point
 and Point
  .
.Note:
You can select:
- an already created point using the Select Point
 option.
 - a midpoint of the curve using the Mid Point
 option.
 - an end point of the curve using the End Point
 option.
 - an intersection point using the Intersection
 option.
 - a projection point using the Projection
 option.
ThePoint Definition dialog box is displayed.
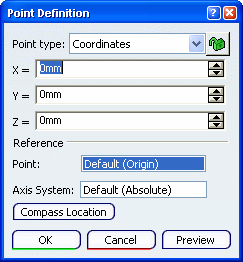
By default, the X, Y and Z coordinates are set to 0.
For more information about Point Definition, see Generative Shape Design User's Guide: Creating Wireframe Geometry: Creating Points.
- an already created point using the Select Point
Click OK.
The start point of route is defined at the origin.
Click Exit and Activate Parent
 to validate and exit the command.